> ## Documentation Index
> Fetch the complete documentation index at: https://docs.vizcom.com/llms.txt
> Use this file to discover all available pages before exploring further.
# Editing areas with selection tools
## Edit specific areas of your render with selection tools
Select and regenerate only parts of your design to refine details, fix issues, or explore new variations without changing the whole image.
## When to use Selection Tools
You can make most regional changes happen by using Modify, describing how to only change a certain area, but if that doesn’t work, selection tools are also avaiable to use. \
\
Selection Tools allow you to modify specific areas of an existing render or image by selecting a region and generating new results just for that section. This gives you precise control over individual design elements while preserving the rest of your work.
This feature is useful for designers refining product details, correcting artifacts, exploring material options, or iterating on specific components without starting over.
Use selection tools when you want to improve, replace, or experiment with individual parts of your design while keeping the overall concept intact.
## How to use Selection Tools
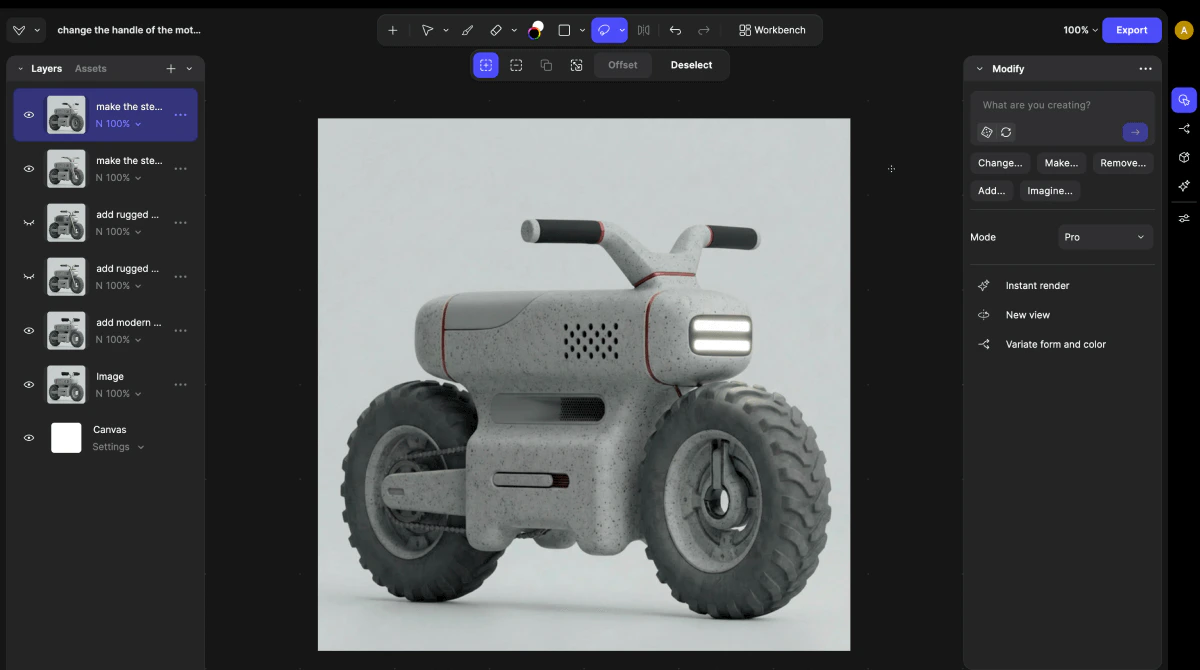 1. Start with a render or image on your canvas.
Note - You need an existing image to edit before using Inpainting.
1. Start with a render or image on your canvas.
Note - You need an existing image to edit before using Inpainting.
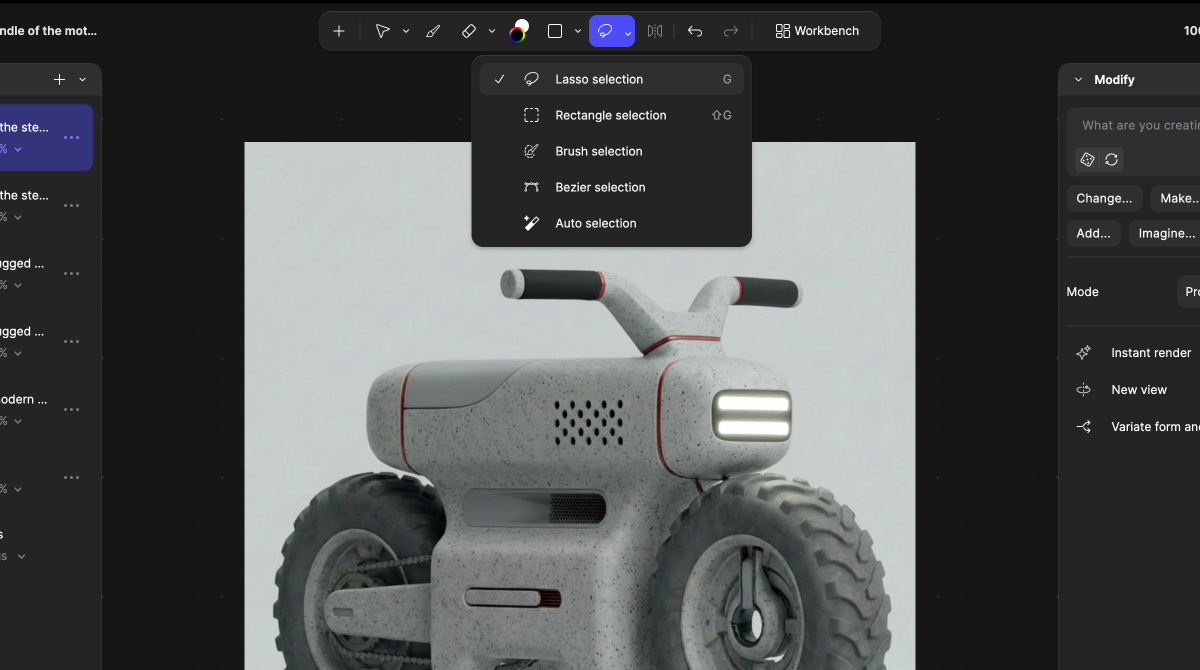 2. Use the Selection Tools
Find the Selection tools in the top toolbar or press G on your keyboard.
You can choose from:
* Lasso selection
* Brush selection
* Bezier selection
* Auto selection
2. Use the Selection Tools
Find the Selection tools in the top toolbar or press G on your keyboard.
You can choose from:
* Lasso selection
* Brush selection
* Bezier selection
* Auto selection
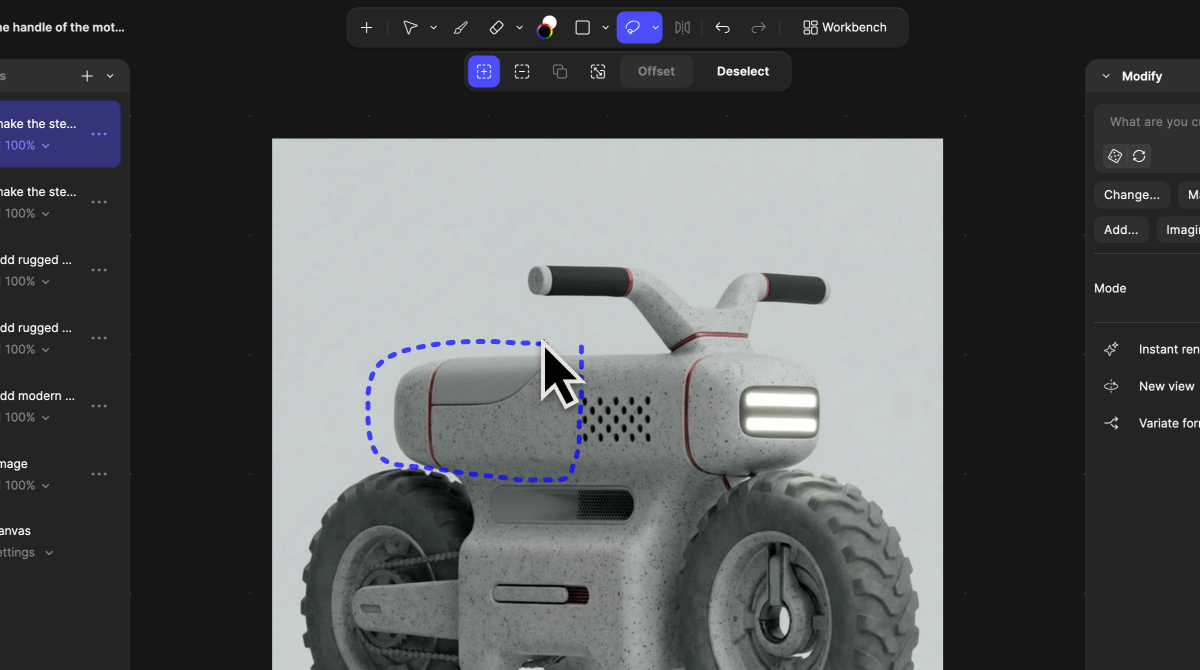 3. Select the area you want to modify.
Draw your selection over the specific part of the design you want to change.
3. Select the area you want to modify.
Draw your selection over the specific part of the design you want to change.
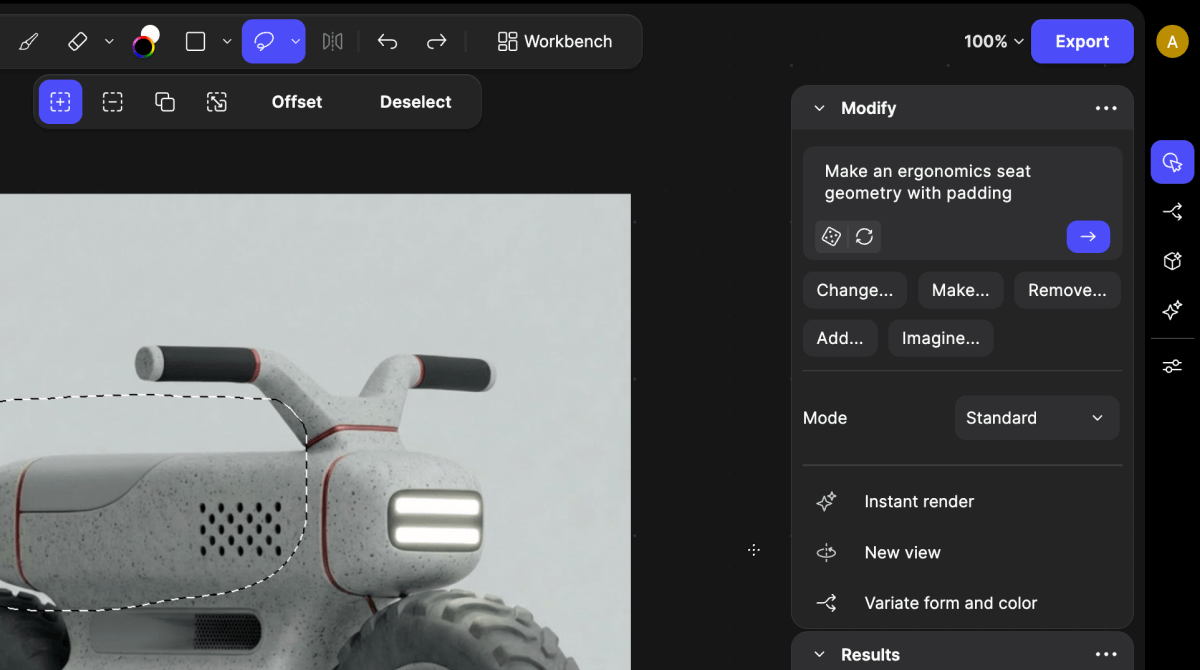 4. Write a prompt describing the selected area.
* Only describe what you want to change inside the selected region.
* You can choose Modify by a prompt or Use render with a reference
4. Write a prompt describing the selected area.
* Only describe what you want to change inside the selected region.
* You can choose Modify by a prompt or Use render with a reference
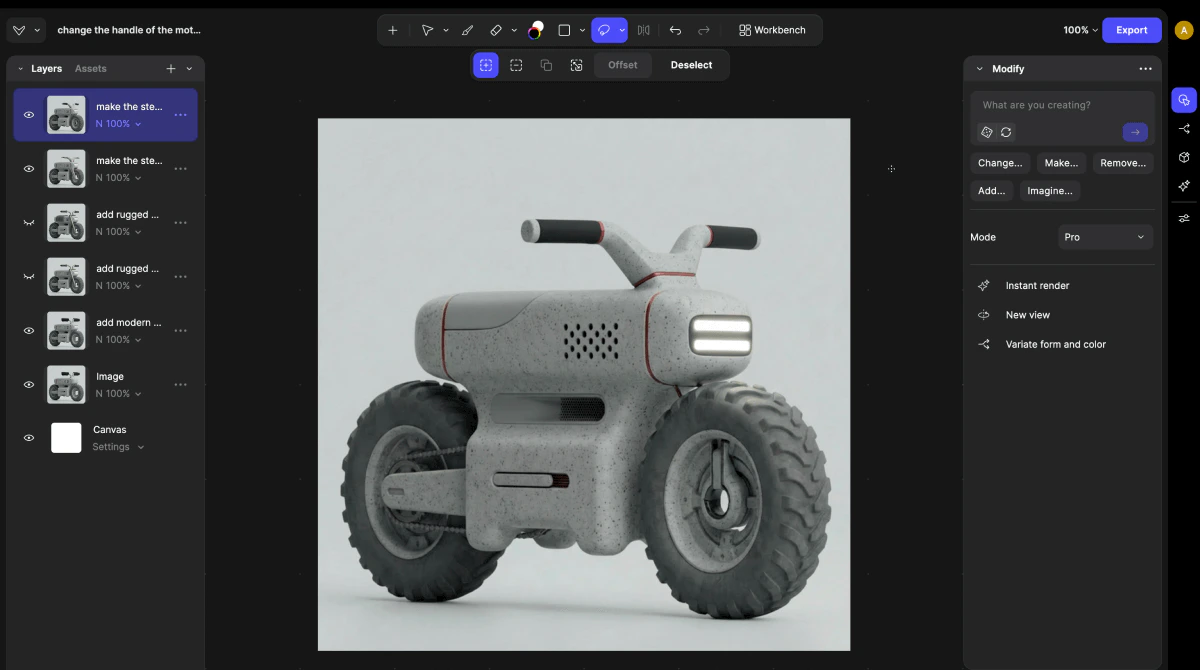 5. Click Generate.
* Continue generating until you achieve your desired result.
## Tips when editing areas with selection tools
* Use Inpainting to refine your designs with precision.
* Common use cases include:
* Fixing small design issues
* Changing materials or colors in one area
* Modifying product components
* Removing unwanted elements
* Testing alternative design variations
##
5. Click Generate.
* Continue generating until you achieve your desired result.
## Tips when editing areas with selection tools
* Use Inpainting to refine your designs with precision.
* Common use cases include:
* Fixing small design issues
* Changing materials or colors in one area
* Modifying product components
* Removing unwanted elements
* Testing alternative design variations
##