> ## Documentation Index
> Fetch the complete documentation index at: https://docs.vizcom.com/llms.txt
> Use this file to discover all available pages before exploring further.
# Render Styles Overview
Choose the visual aesthetic that best suits your design intent and bring your sketches to life with compelling, tailored render outputs.
Render Styles (called Styles in Vizcom) let you define the overall look and feel of your generated renderings from photorealistic visuals to stylized artistic expressions.
Picking the right style helps you communicate material, form, and mood more effectively.
## When to use Render Styles
Render Styles are ideal for designers, illustrators, and product creators who want control over the **visual direction of their renders**. With a library of styles ranging from clean studio renderings to bold stylized aesthetics, you can tailor outputs to:
* Highlight product detail and material realism
* Explore different artistic or conceptual directions
* Match visual outputs to brand or project aesthetic goals
* Communicate design intent clearly to teammates, stakeholders, or clients
Render Styles directly influence the look of your generated images in *Render mode*. They act like render engine presets that define lighting, shading, and overall artistic treatment.
## How to use Render Styles
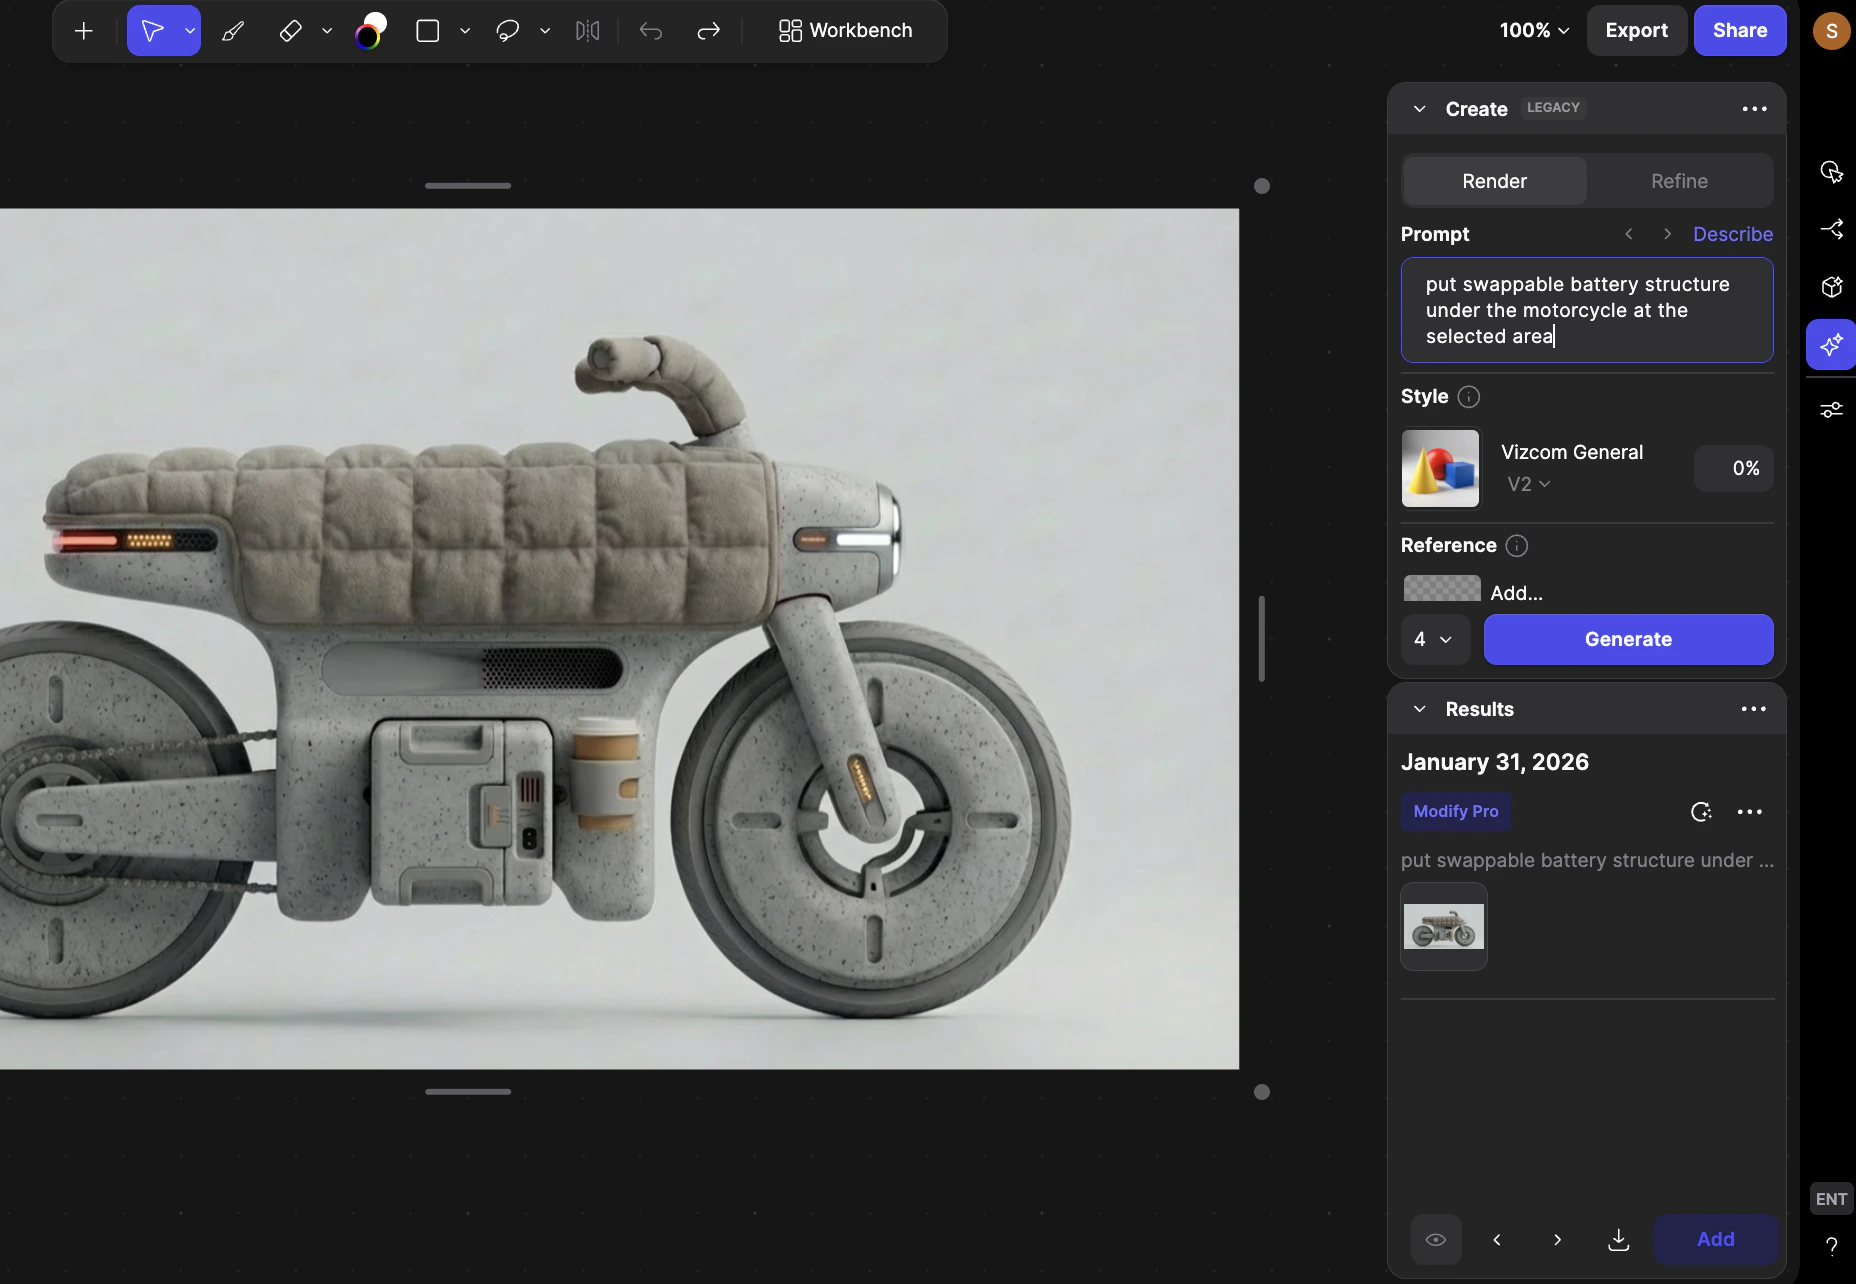 Make sure your file is in *Render mode* so styles can be applied during generation.
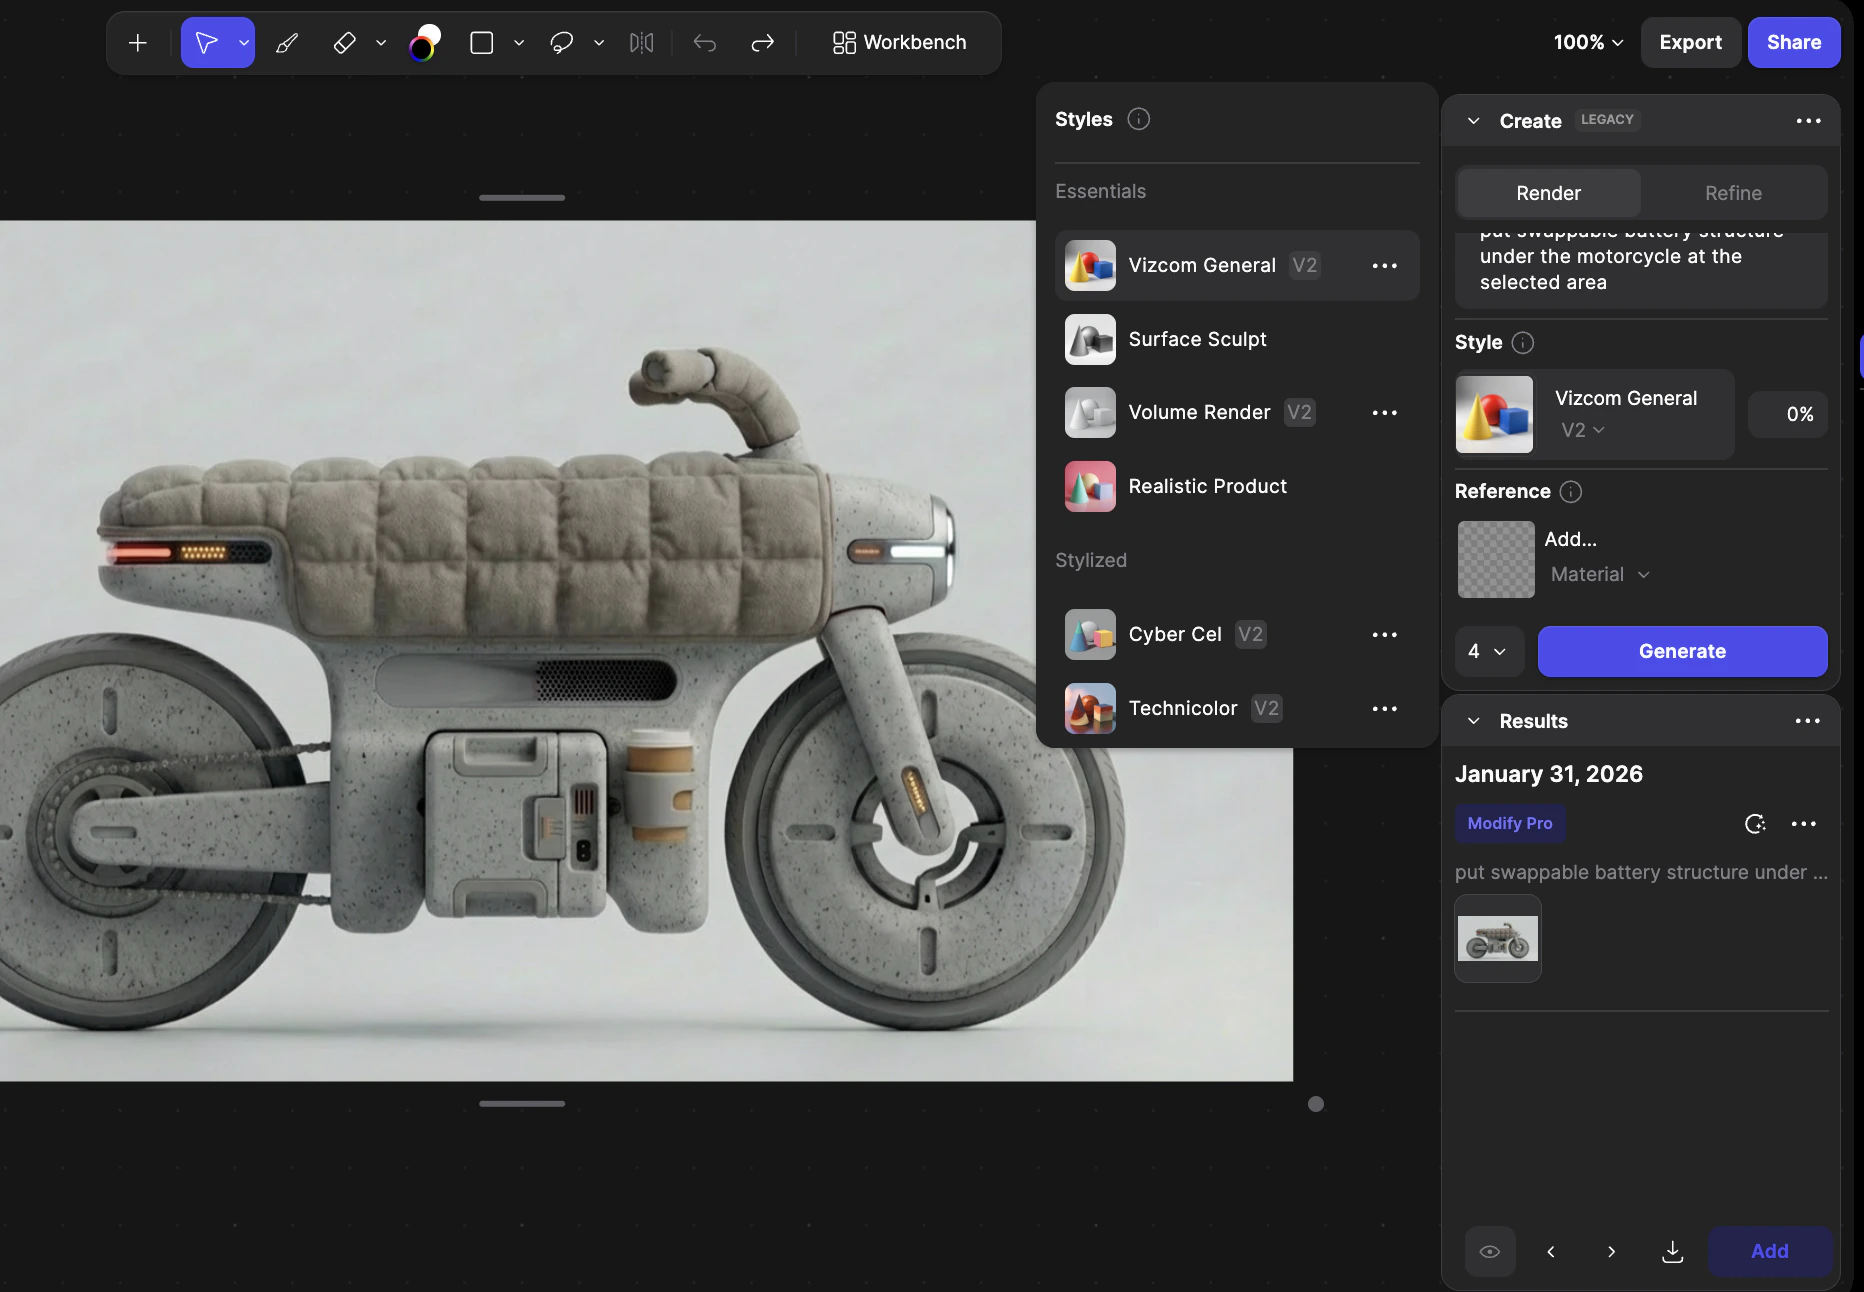 In the Create panel under the *Style* section, open the dropdown.
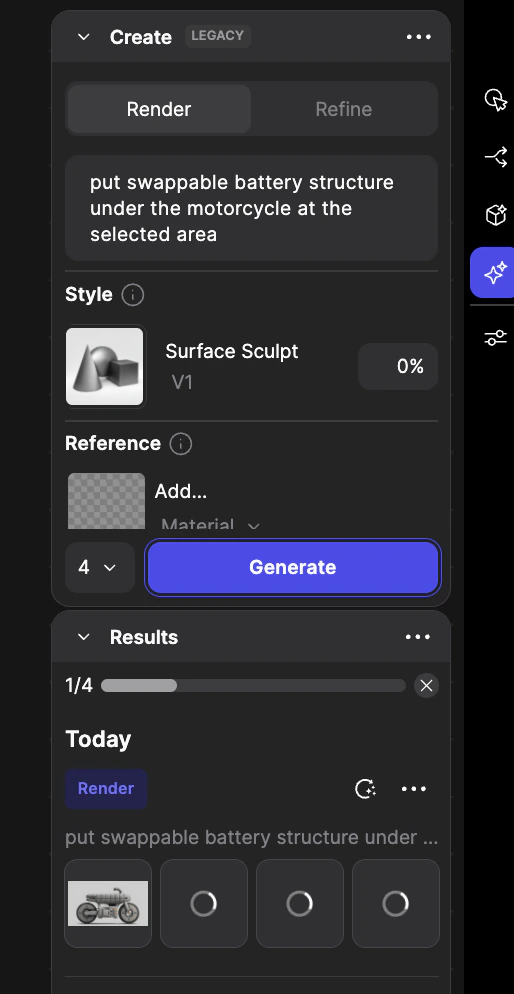 Pick from available style options based on the visual aesthetic you want: photorealistic, volumetric, stylized, or industry-specific presets.
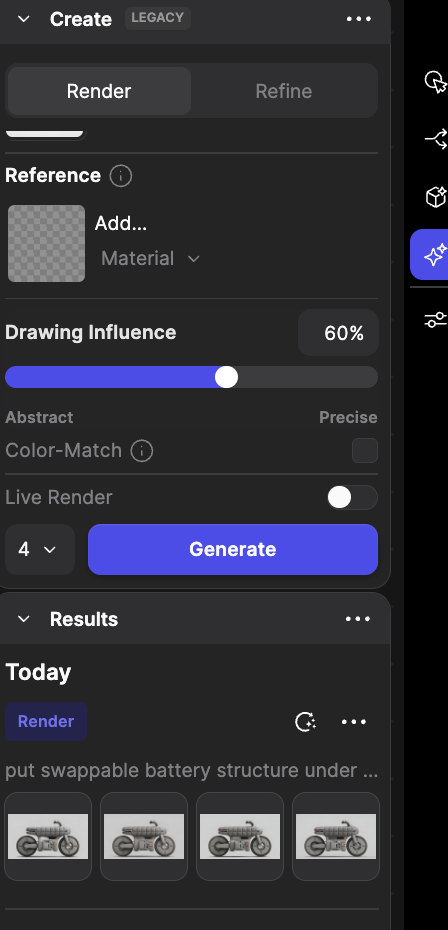 Use the *Influence* slider to control how strongly the chosen style should influence your final rendering.
Click *Generate*. Vizcom will produce an image using your selected style and influence settings.
## **Render Style Categories & Examples**
### **Essentials**
These are broad-use, versatile styles useful across many domains:
* **Vizcom General**: Balanced, photorealistic rendering with creative flexibility.
* **Surface Sculpt**: Clean, dynamic surfaces ideal for fluid form studies.
* **Volume Render**: Emphasizes depth and form without distracting elements.
### **Stylized**
Render with distinctive artistic character:
* **CyberCel**: Vibrant flat colors, bold outlines.
* **Technicolor 6**: Futuristic, high-contrast, concept art vibe.
* **Pastel Render:** Soft, soothing color.
### **Industry-Specific**
Tailored for particular design domains:
* **Automotive Exterior** – Emphasizes shadows and reflections for car designs.
* **Automotive Interior** – Focuses on texture, lighting, and space.
## Tips & FAQ
Start with *Vizcom General* if you’re unsure as it offers a flexible, photorealistic aesthetic that’s effective across many product types.
Use the \_ Influence\_ slider to go from subtle shading to strong stylized interpretation. High influence makes the style dominant; low influence keeps more of your original sketch characteristics.
### FAQ
* **Can I combine multiple styles?**\
Not in a single generation, but you can use inpainting selections to render different parts of a design with different styles, then merge them.
* **Will styles affect the geometry?** Styles mainly affect visual aesthetics lighting, color, shading, not the actual 3D shape or geometry of models.
**Do stylized s follow color prompts precisely?**\
Stylized s have a strong aesthetic direction and may not follow color prompts as literally as more general styles.
## **Next Steps**
* **Experiment with styles** — Try different style categories to find the one that best fits your project’s visual goals.
* **Use Reference Images** — Combine styles with reference imagery for more nuanced visual influence.
* **Explore Creation** — Soon you’ll be able to create custom s tailored to your brand.
* **Try Refinement** — Use *Refine mode* with your chosen style for higher detail and polish. \\
Use the *Influence* slider to control how strongly the chosen style should influence your final rendering.
Click *Generate*. Vizcom will produce an image using your selected style and influence settings.
## **Render Style Categories & Examples**
### **Essentials**
These are broad-use, versatile styles useful across many domains:
* **Vizcom General**: Balanced, photorealistic rendering with creative flexibility.
* **Surface Sculpt**: Clean, dynamic surfaces ideal for fluid form studies.
* **Volume Render**: Emphasizes depth and form without distracting elements.
### **Stylized**
Render with distinctive artistic character:
* **CyberCel**: Vibrant flat colors, bold outlines.
* **Technicolor 6**: Futuristic, high-contrast, concept art vibe.
* **Pastel Render:** Soft, soothing color.
### **Industry-Specific**
Tailored for particular design domains:
* **Automotive Exterior** – Emphasizes shadows and reflections for car designs.
* **Automotive Interior** – Focuses on texture, lighting, and space.
## Tips & FAQ
Start with *Vizcom General* if you’re unsure as it offers a flexible, photorealistic aesthetic that’s effective across many product types.
Use the \_ Influence\_ slider to go from subtle shading to strong stylized interpretation. High influence makes the style dominant; low influence keeps more of your original sketch characteristics.
### FAQ
* **Can I combine multiple styles?**\
Not in a single generation, but you can use inpainting selections to render different parts of a design with different styles, then merge them.
* **Will styles affect the geometry?** Styles mainly affect visual aesthetics lighting, color, shading, not the actual 3D shape or geometry of models.
**Do stylized s follow color prompts precisely?**\
Stylized s have a strong aesthetic direction and may not follow color prompts as literally as more general styles.
## **Next Steps**
* **Experiment with styles** — Try different style categories to find the one that best fits your project’s visual goals.
* **Use Reference Images** — Combine styles with reference imagery for more nuanced visual influence.
* **Explore Creation** — Soon you’ll be able to create custom s tailored to your brand.
* **Try Refinement** — Use *Refine mode* with your chosen style for higher detail and polish. \\