

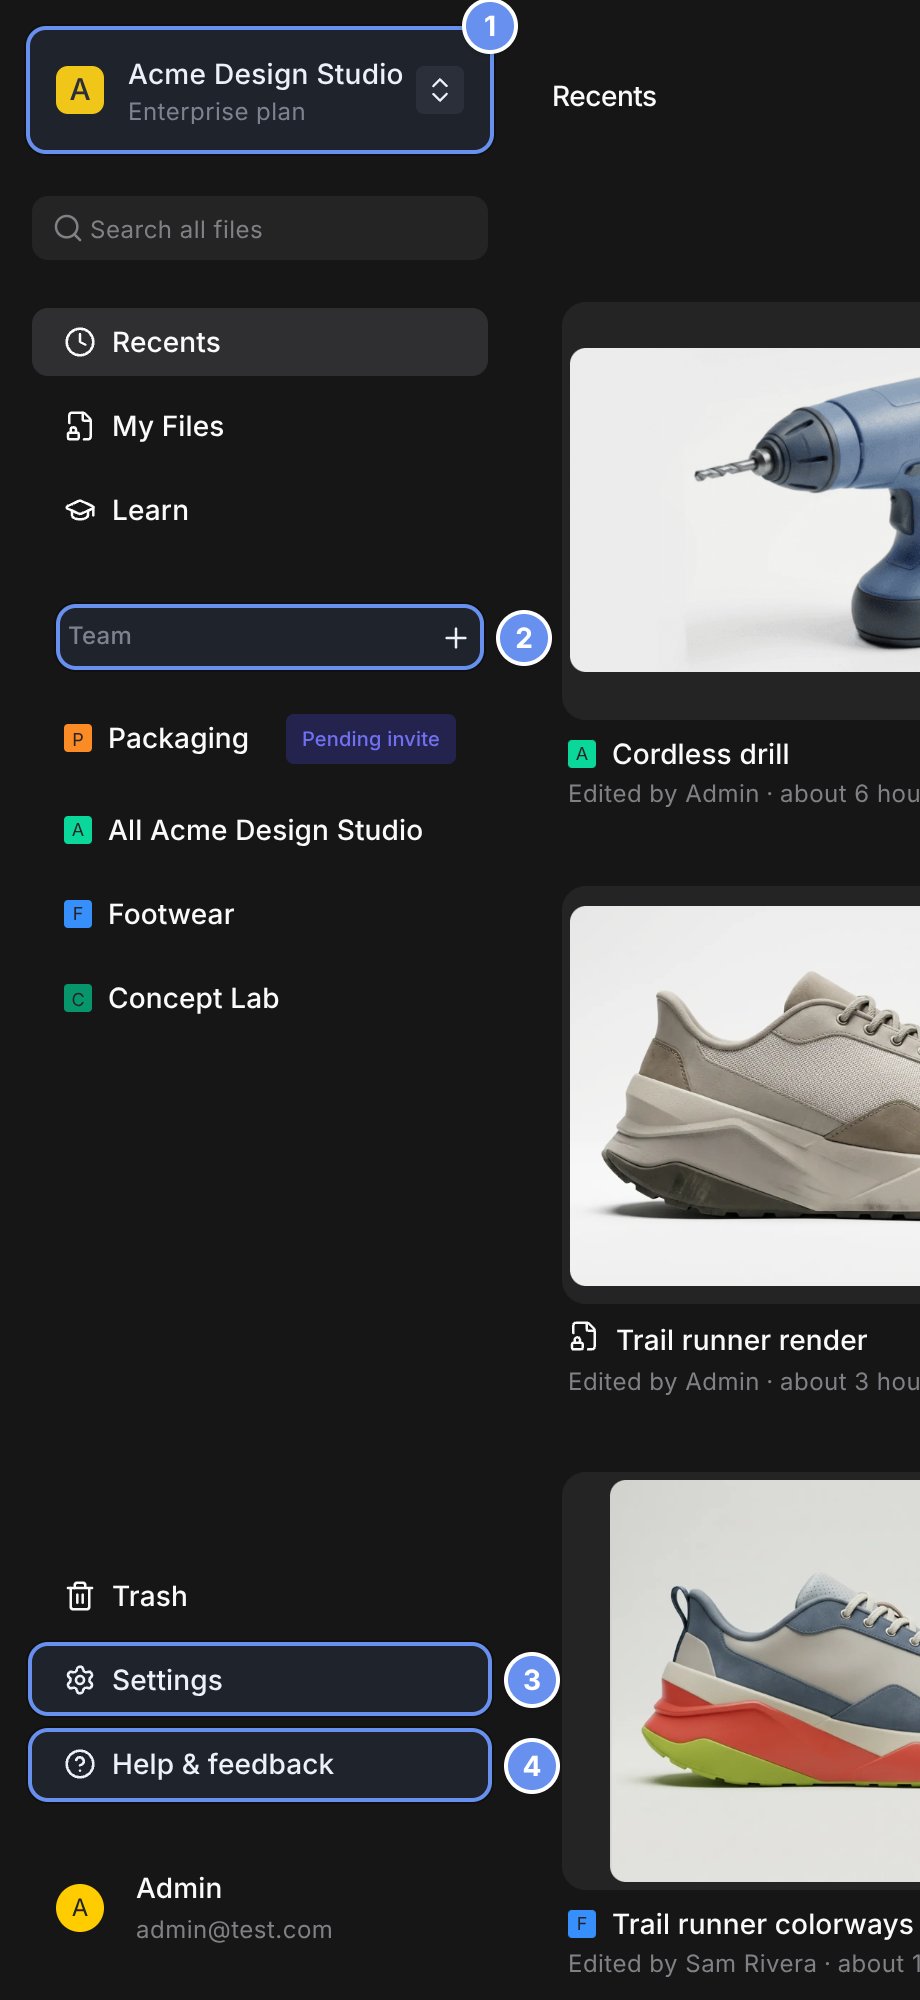
Workspace switcher (1), new team (2), Settings (3) and Help & feedback (4).
First-week checklist
1
Name the workspace
Click Settings 3 > General, edit Workspace name and click Save. Click Upload logo to add a logo.
2
Pick roles
Workspace Admins, Team Admins and Editors use a paid seat; Viewers and Billing Admins don’t. Keep at least two admins. See Roles and permissions.
3
Plan teams
Split work by department, product line or project, and choose All Workspace or Invite Only for each. Extra teams need Organization, Enterprise or Edu. See Teams and workspaces.
4
Invite members
In Settings > Members, click Invite members, paste addresses, pick a role and click Invite. Send them Join your workspace. See Members and seats.
5
Create teams
Click + 2 next to Team in the sidebar, or Settings > Teams > Create team.
6
Review Security
On Organization and Enterprise, open Settings > Security and set access, sharing, AI and watermark controls. See Workspace security settings.
7
Set up SSO (Enterprise)
Contact your Vizcom account team, and forward IT what they’ll need.
8
Open your network
Give IT the host list for your firewall or proxy.
9
Check usage
On Organization and Enterprise, Settings > Data shows generations and logs. See Usage and audit logs.
10
Review your plan
Open Settings > Plans & Billing, or Insights on an Enterprise credit contract. See Billing.
Get help
Click Help & feedback 4 for tutorials, documentation and Contact support. See Support.Related
Enterprise rollout
A company-wide rollout plan.
Organization console
Several workspaces under one company.