

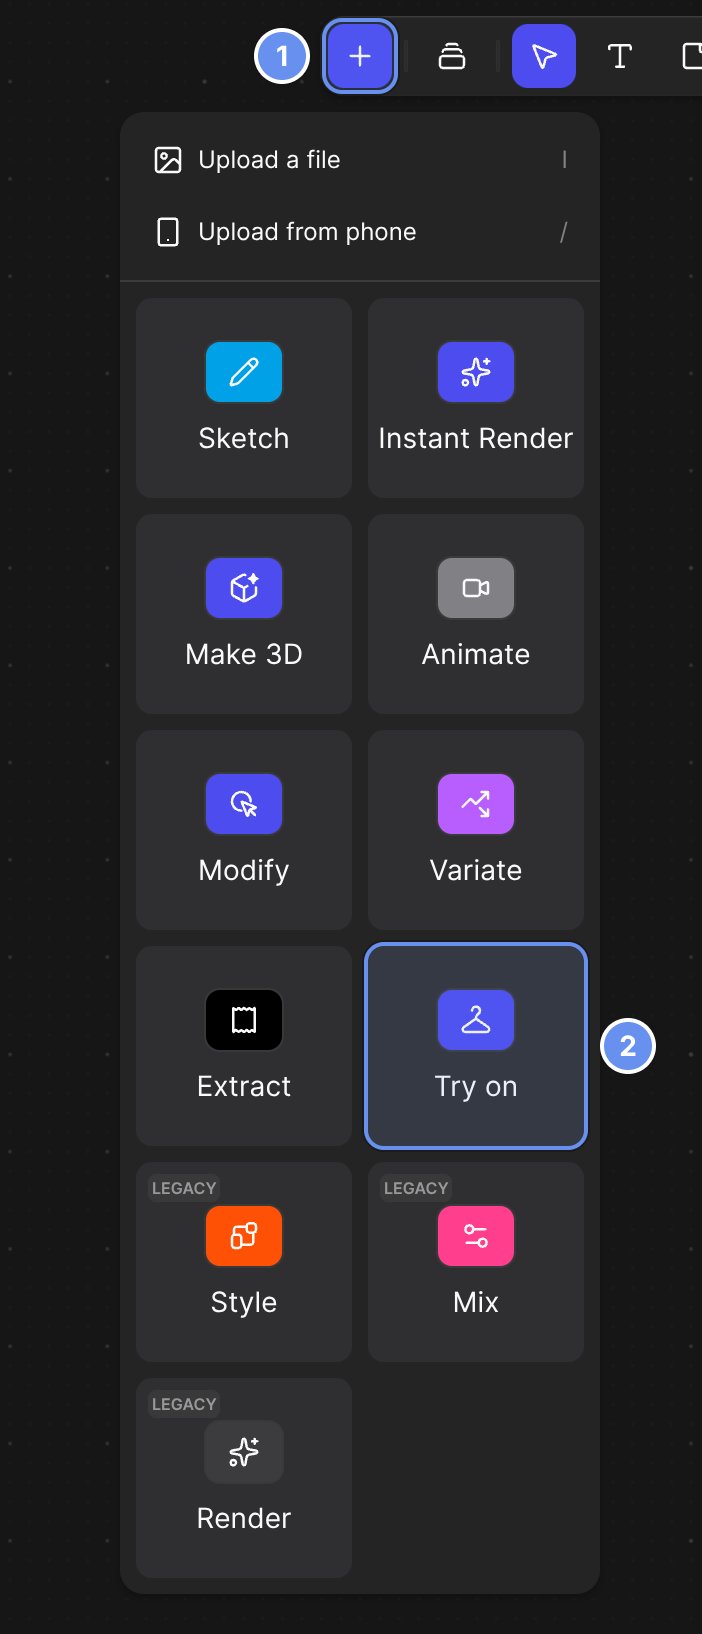
Click Insert (+) (1), then Try on (2).
Put a product on a model with Try on
1
Add a Try on block
Click Insert (+) 1 > Try on 2.
2
Add items
Add up to 8 product images under Items.
3
Add models (optional)
Add up to 4 photos of a person (1 on Free), or none for a generated model.
4
Choose a pose
Pick one under Pose, or type a Custom pose.
5
Generate
Click Try-on. You get one result per model.
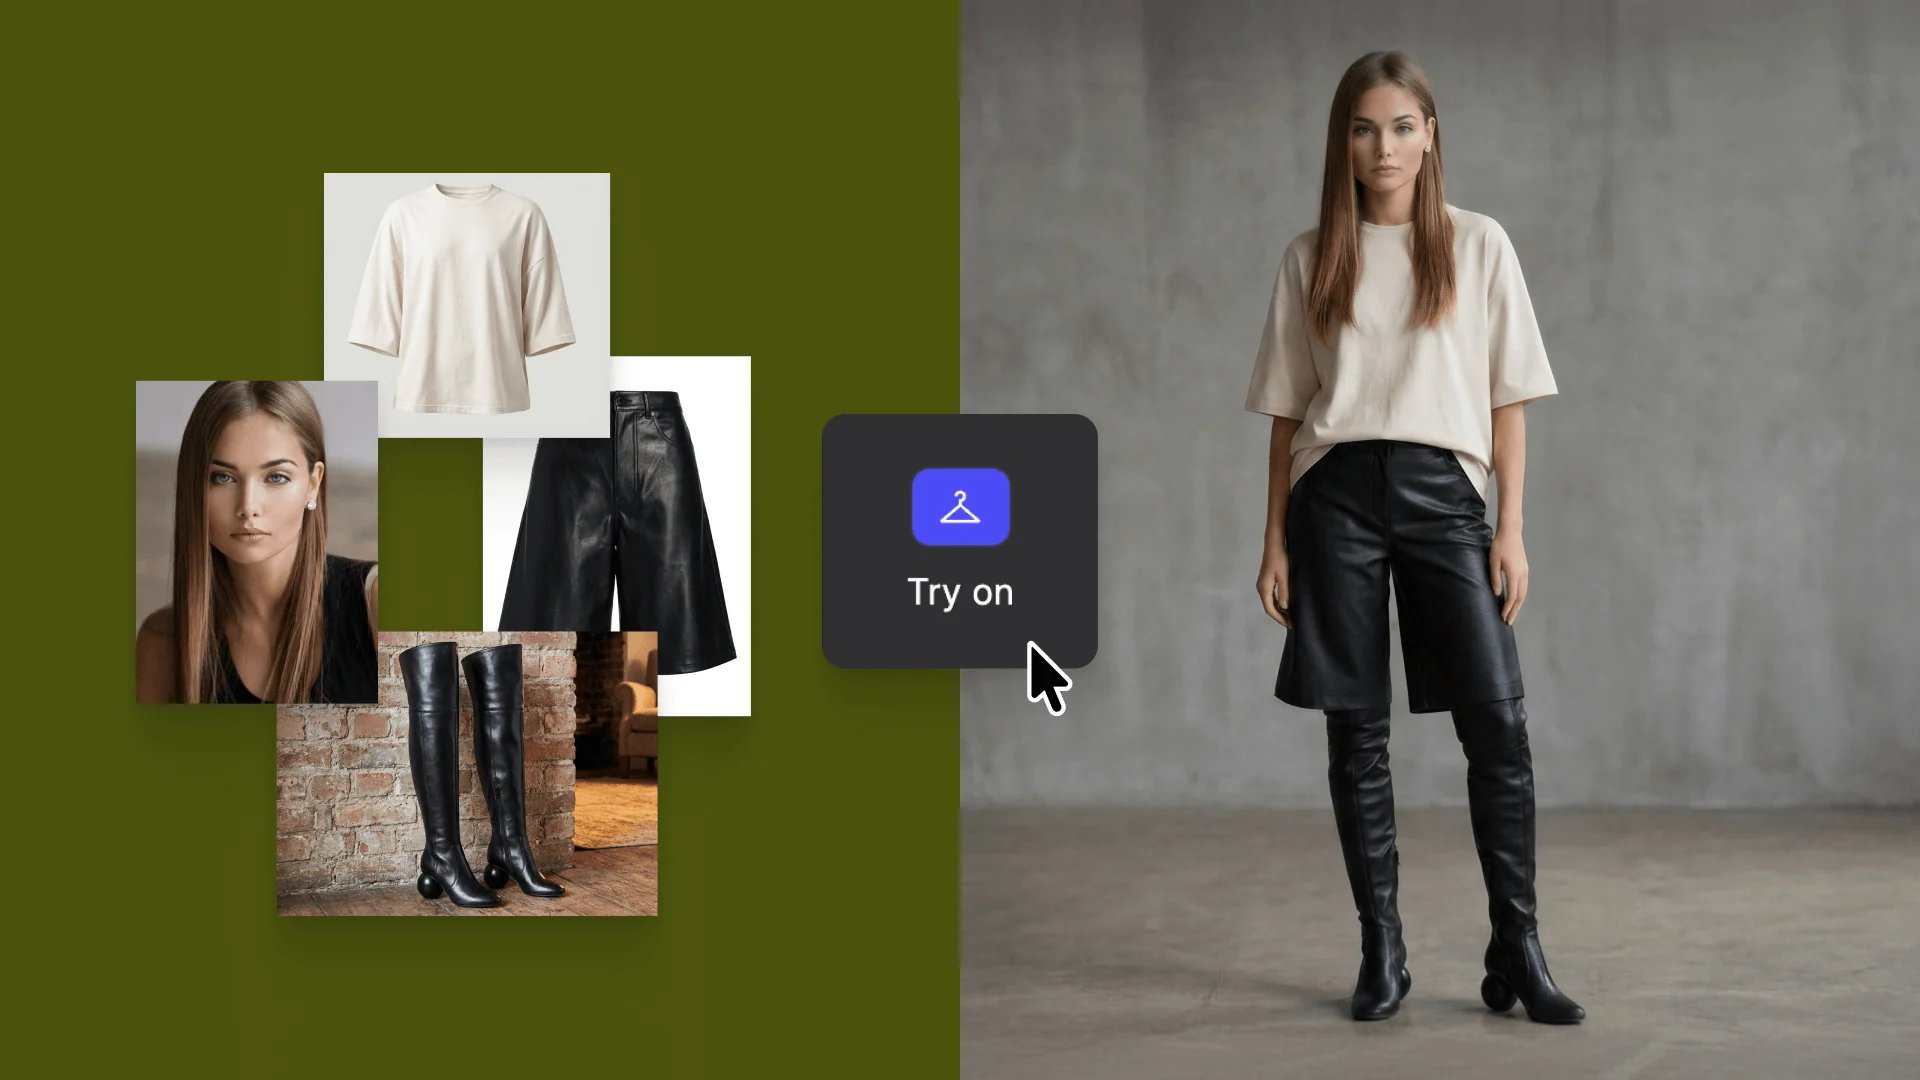
Try on: a tee, shorts and boots as items, and the model wearing the full look.
Place a product in a scene with Modify
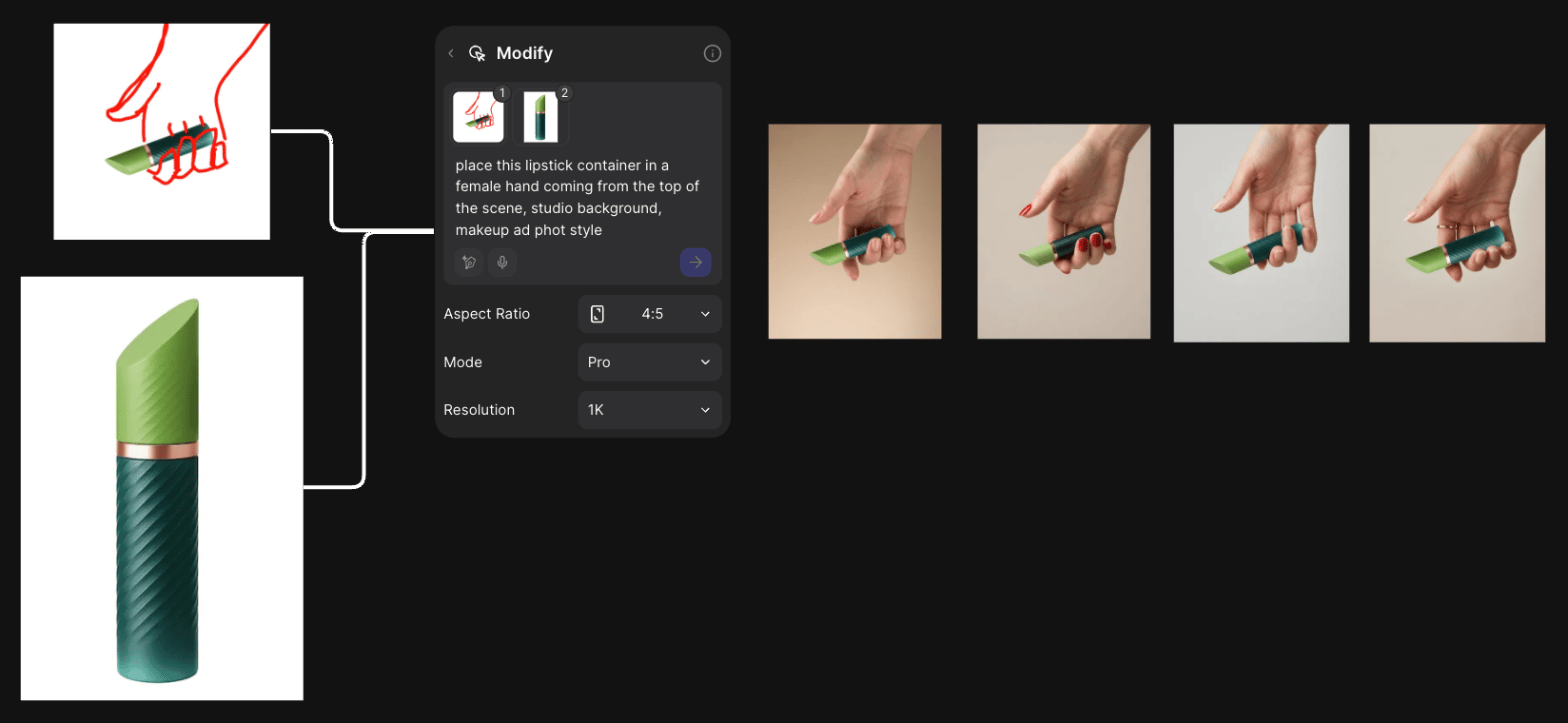
A rough hand sketch and a product render combine into in-hand photography.
1
Get a scene
Upload an environment photo, or describe one in a Modify block.
2
Connect the scene and the product
Select both and press Q. Drag the scene’s thumbnail last to keep its shape.
3
Say where it goes
Type, for example, “Place @1 on top of the rock in @2, matching the lighting of the scene.”
4
Generate and compare
If the product changes, add “Keep @1 unchanged” or switch to Pro.
Keep the product consistent across scenes
1
Make the key views
Use New view for a front three-quarter, rear three-quarter and side view.
2
Connect every view to one Modify block
Select up to 4 views and press Q.
3
Prompt the scene
Type, for example, “Place the helmet on a modern motorcycle in a high-speed studio environment.”
Borrow an environment with the Smart Dropper
- Click the Smart Dropper caret in the toolbar and choose Environment.
- Click the scene, then click your product.
Composite by hand and blend with Unify
Unify blends everything visible in Studio into one image with matching light and shadows.1
Add a background
Put an environment image at the bottom of the layers.
2
Add and place the product
Remove its background (Adjust > Remove Bg.), then place it with Transform (M).
3
Run Unify
Click Adjust > Unify.
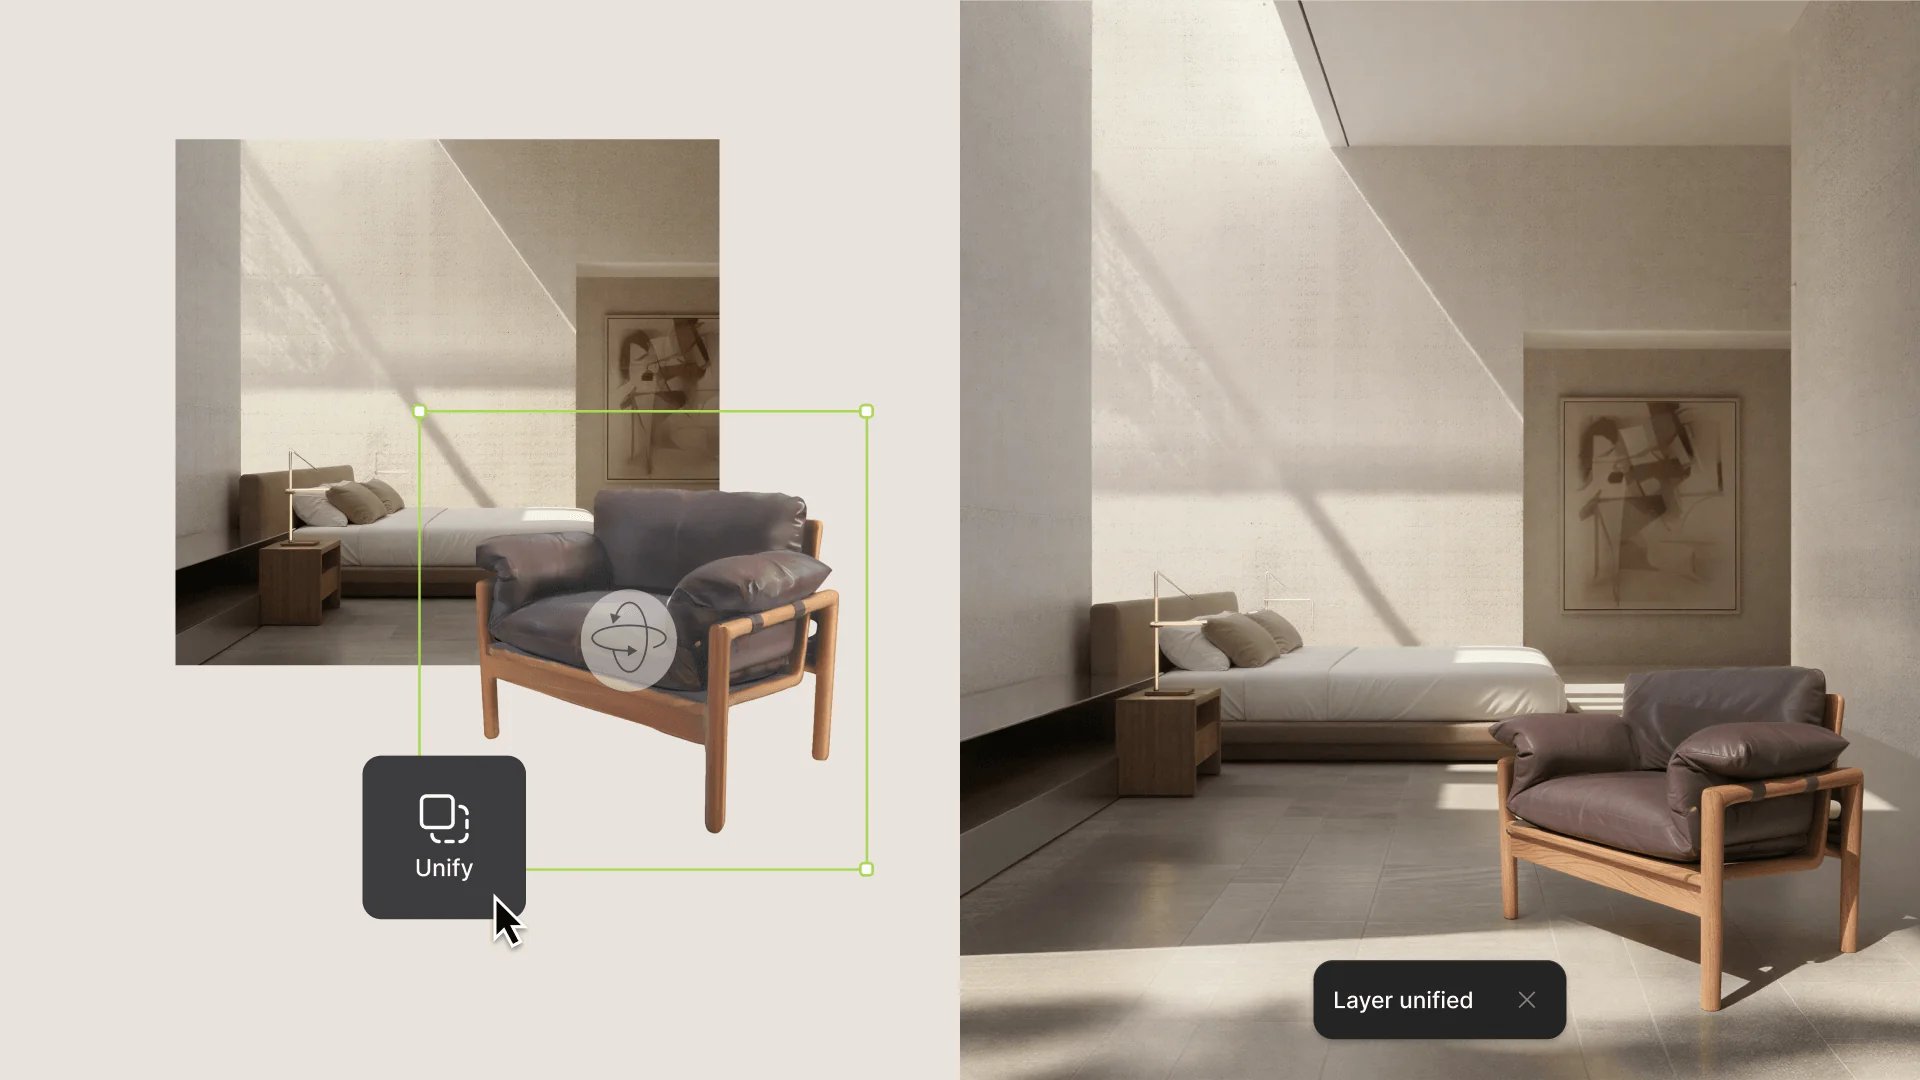
A chair layer over a room photo (left), unified with the room's light (right).
Related
Rendering in context
A full lifestyle image workflow.
Match a look
References and collections.
Try on
Every Try on option.
Unify
How Unify blends layers.