Learn the basics of prompting in Vizcom
Direct specific changes to your design using clear, visual instructions without rewriting the entire scene.Prompting in Modify
Prompting is at the core of Vizcom in order to generate & manipulate images. We believe that prompting should be thought of similar to asking another designer to make a change to an image. With natural, clear communication that is specific and action oriented. This document covers the best practices for prompting in Vizcom using the Modify tool.How to prompt in Modify
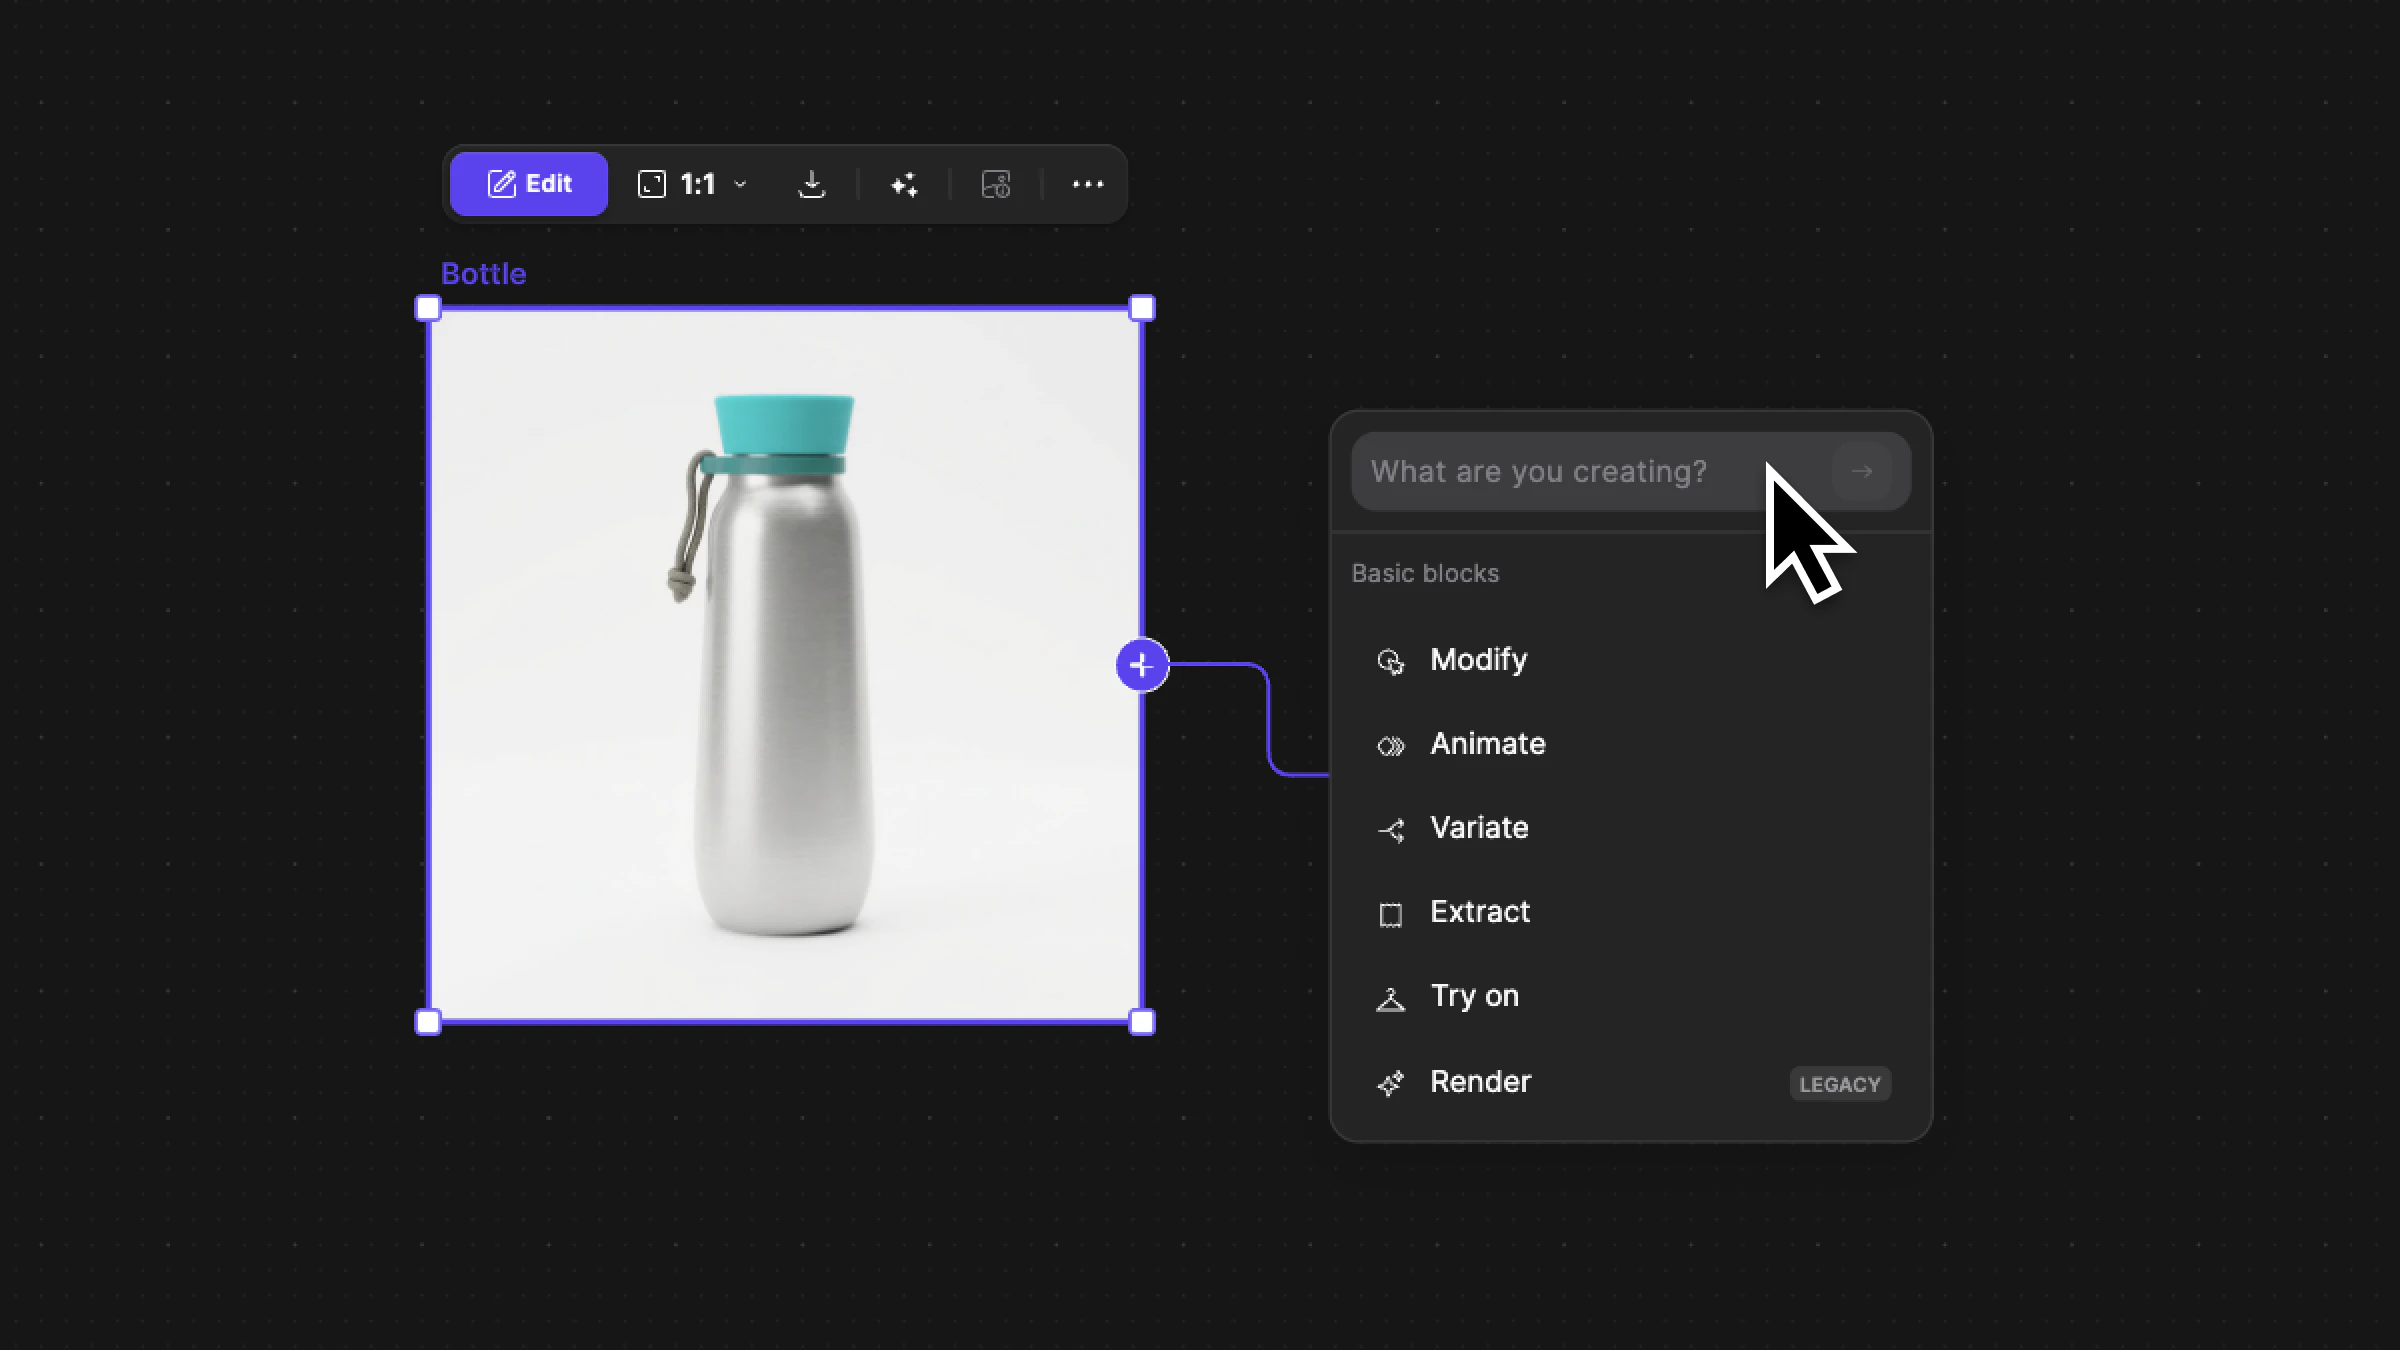
Prompting in Workbench:Create a Modify block by dragging an arrow from the + of an image and selecting Modify, or by creating a new block from the insert menu and connecting it to your image.
Enter your prompt using natural language.
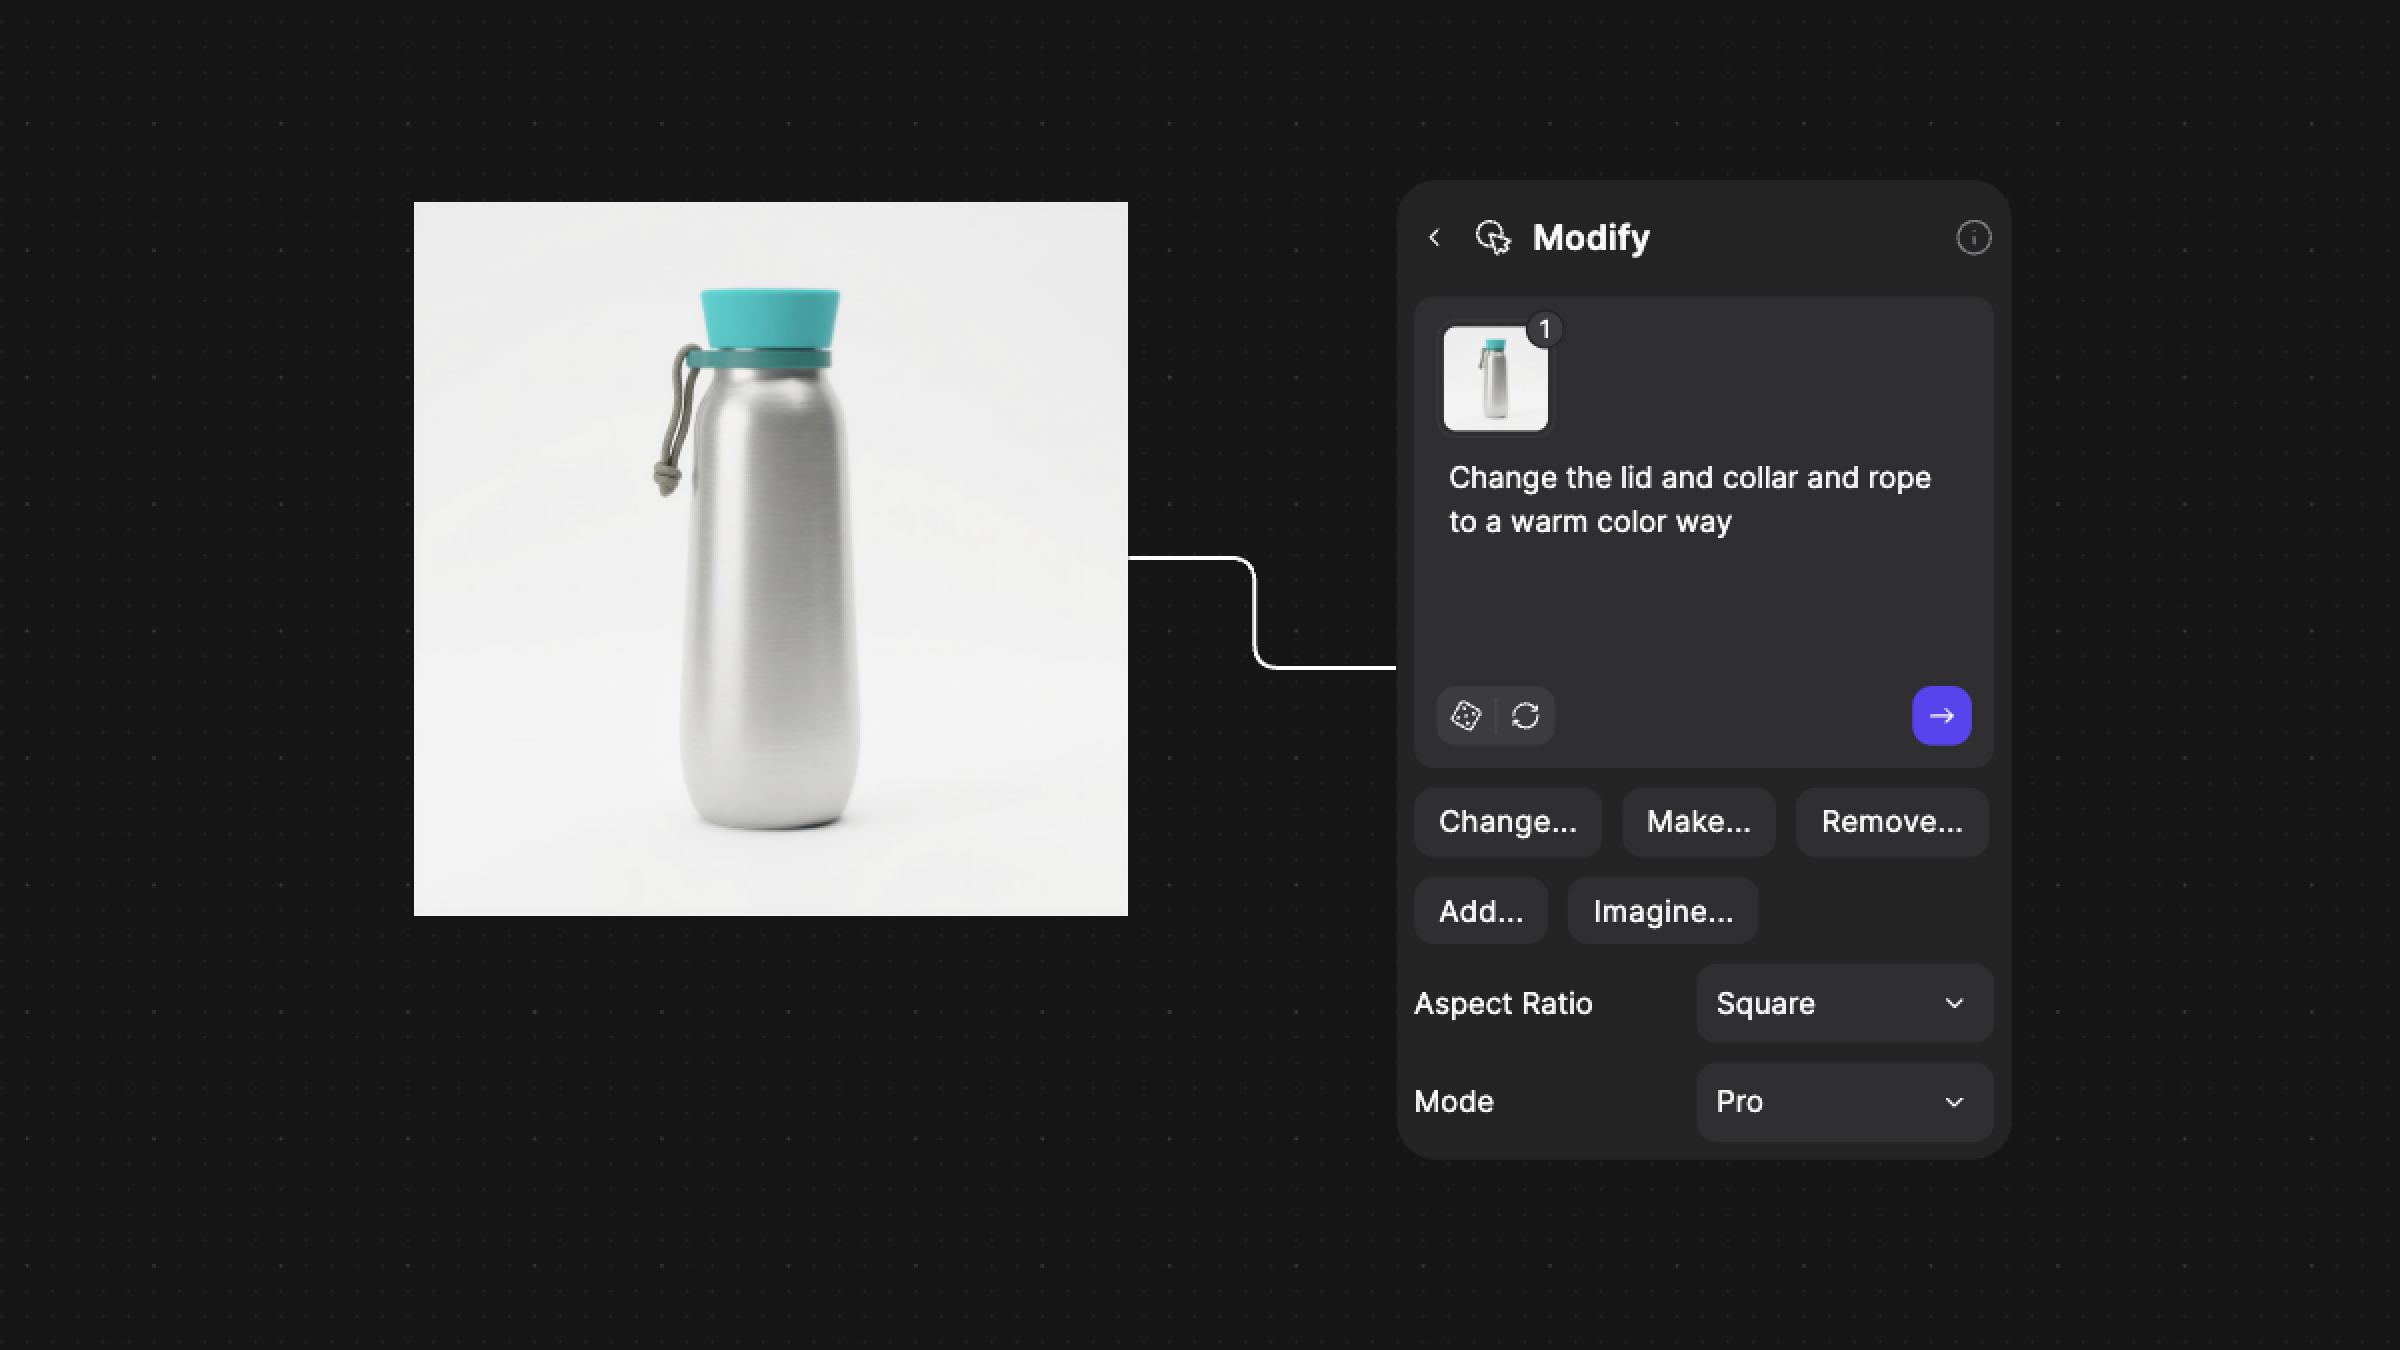
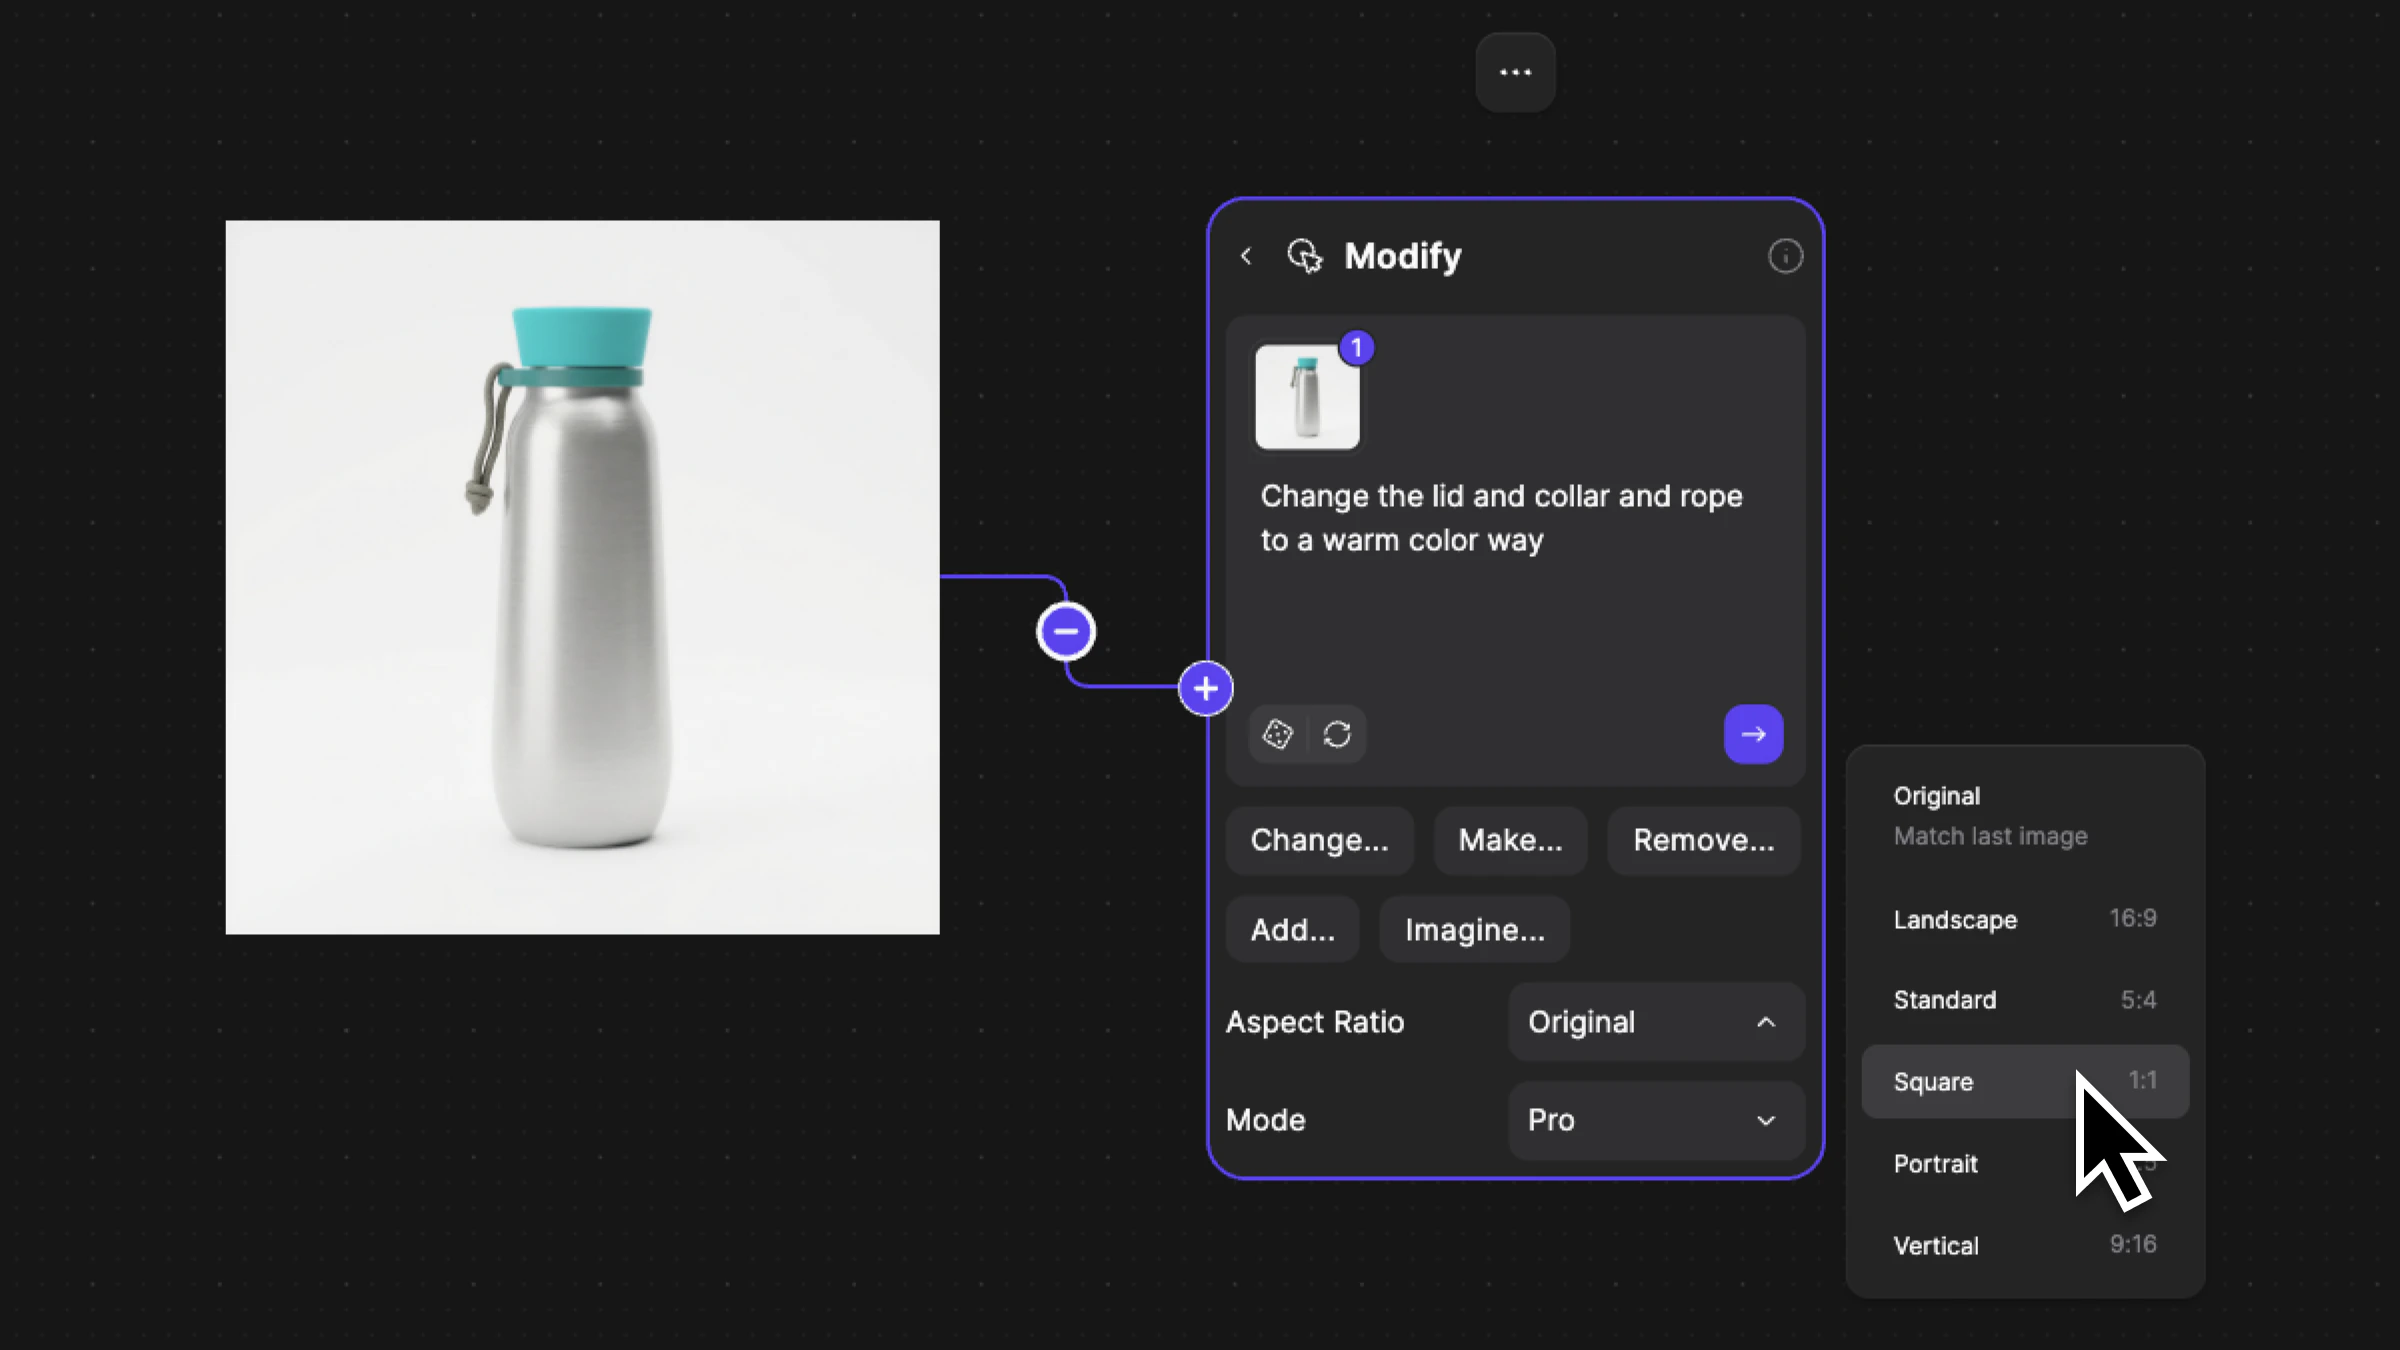
Control the aspect ratio of your output or adjust the Modify mode.
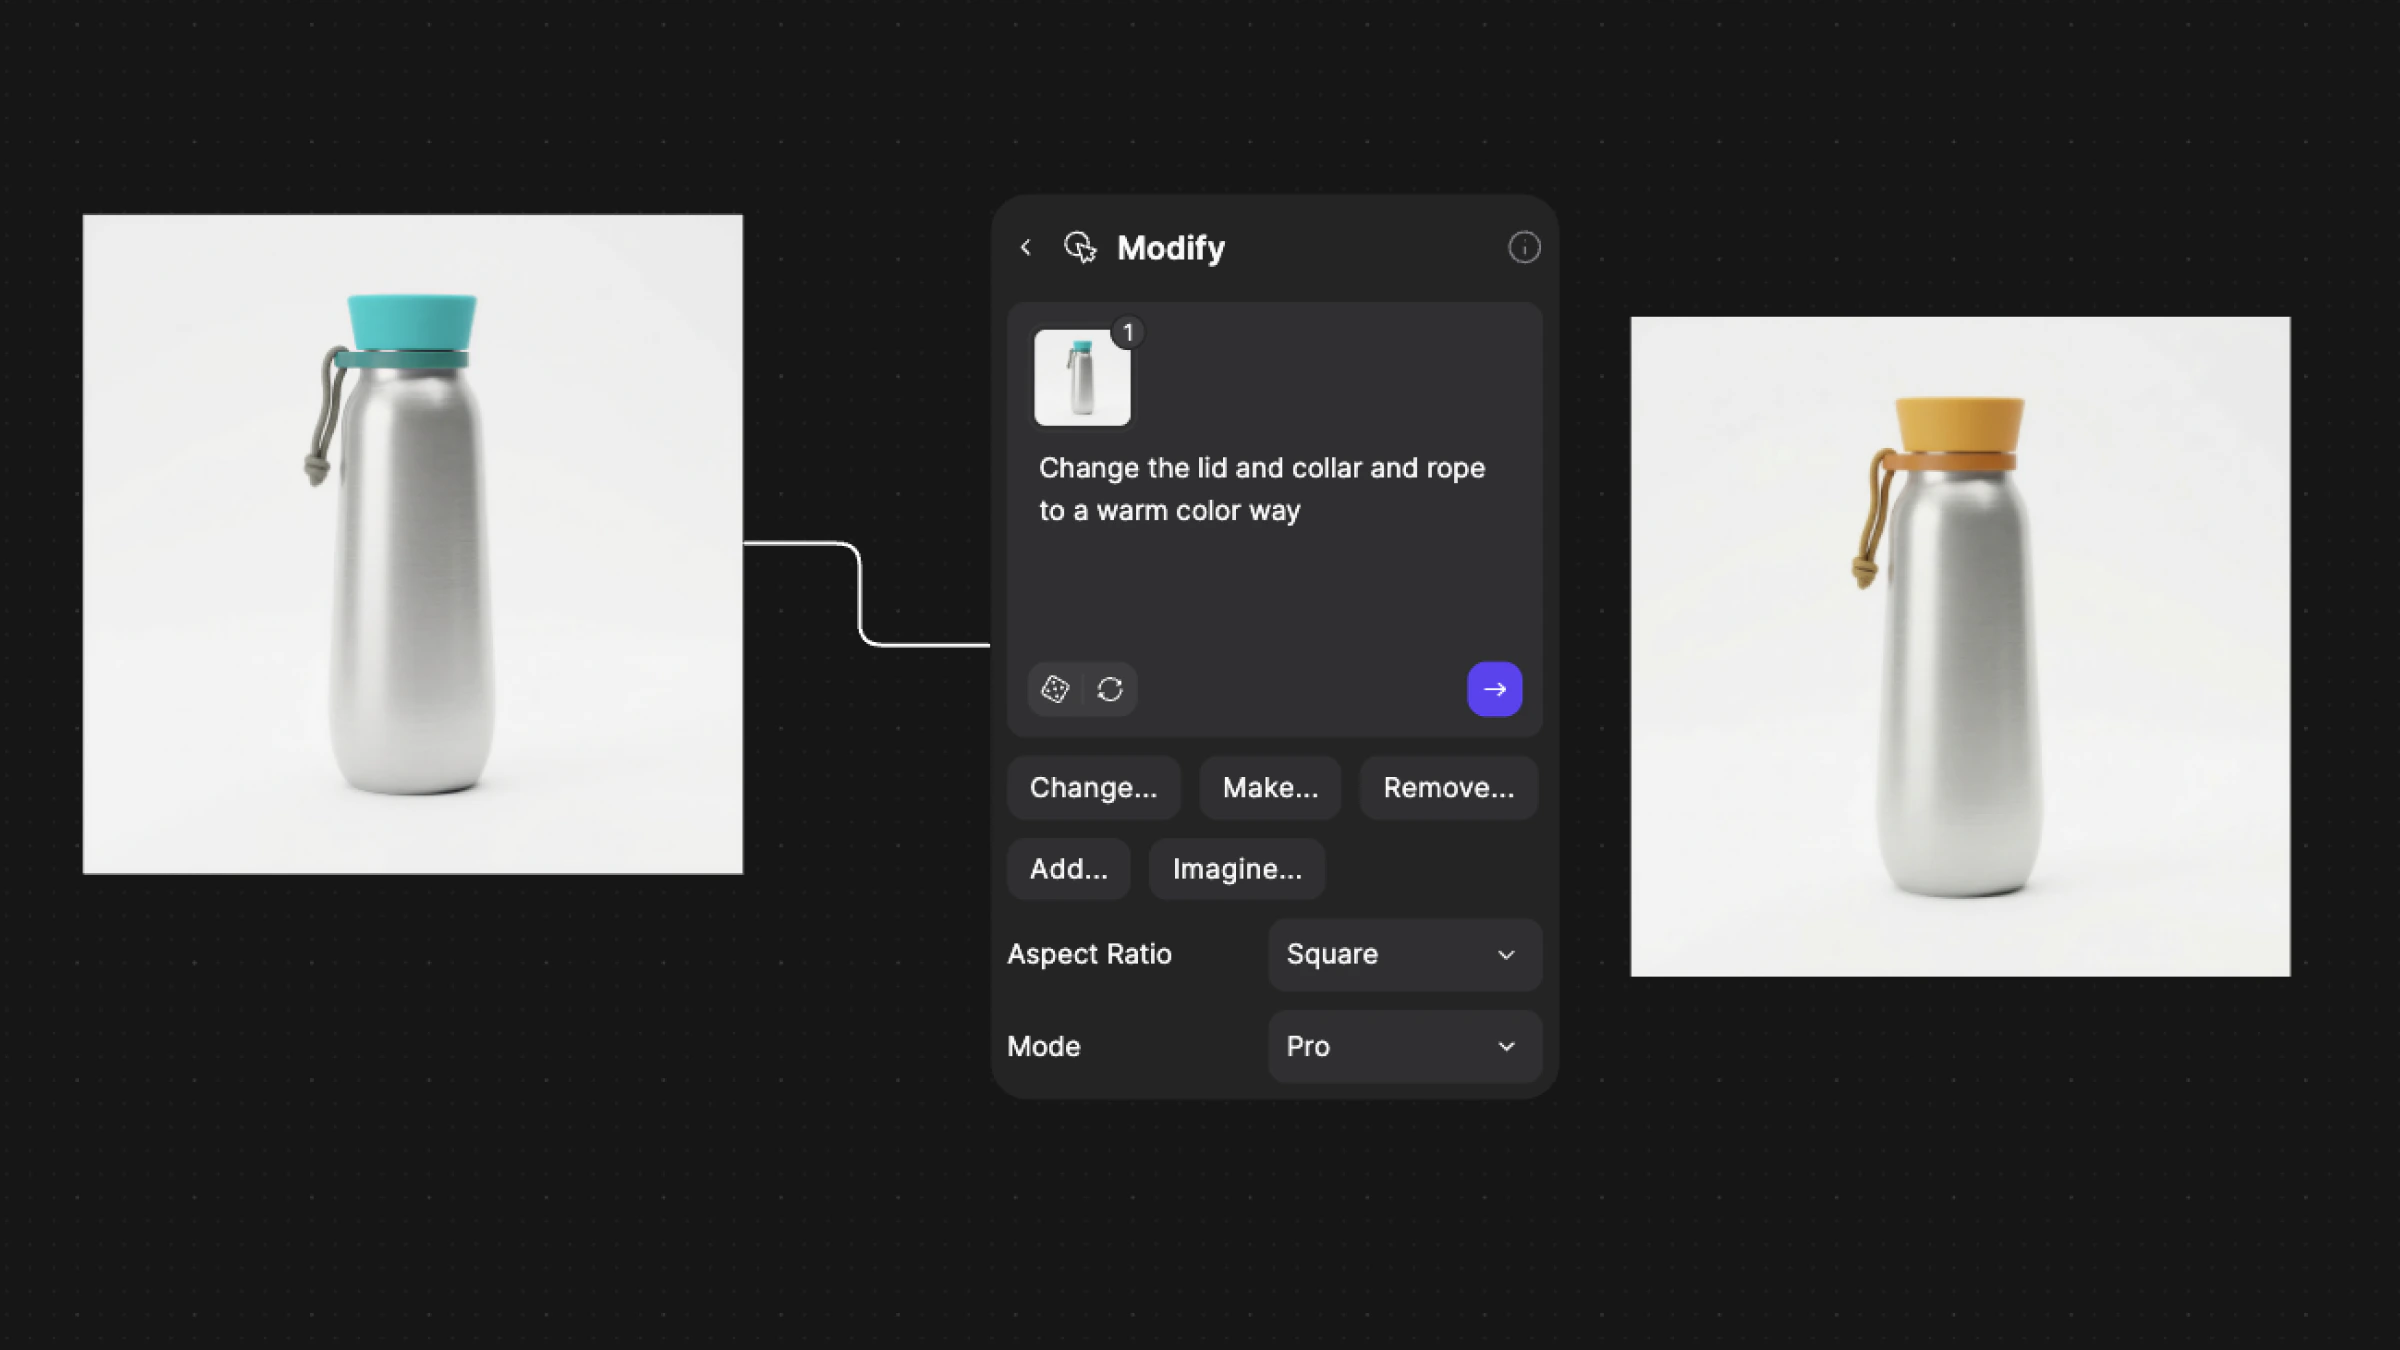
Click the purple arrow or hit enter on your keyboard when the prompt block is selected to generate an image.
Navigate into Studio by double clicking an image, or clicking an image and selecting edit from the context menu.
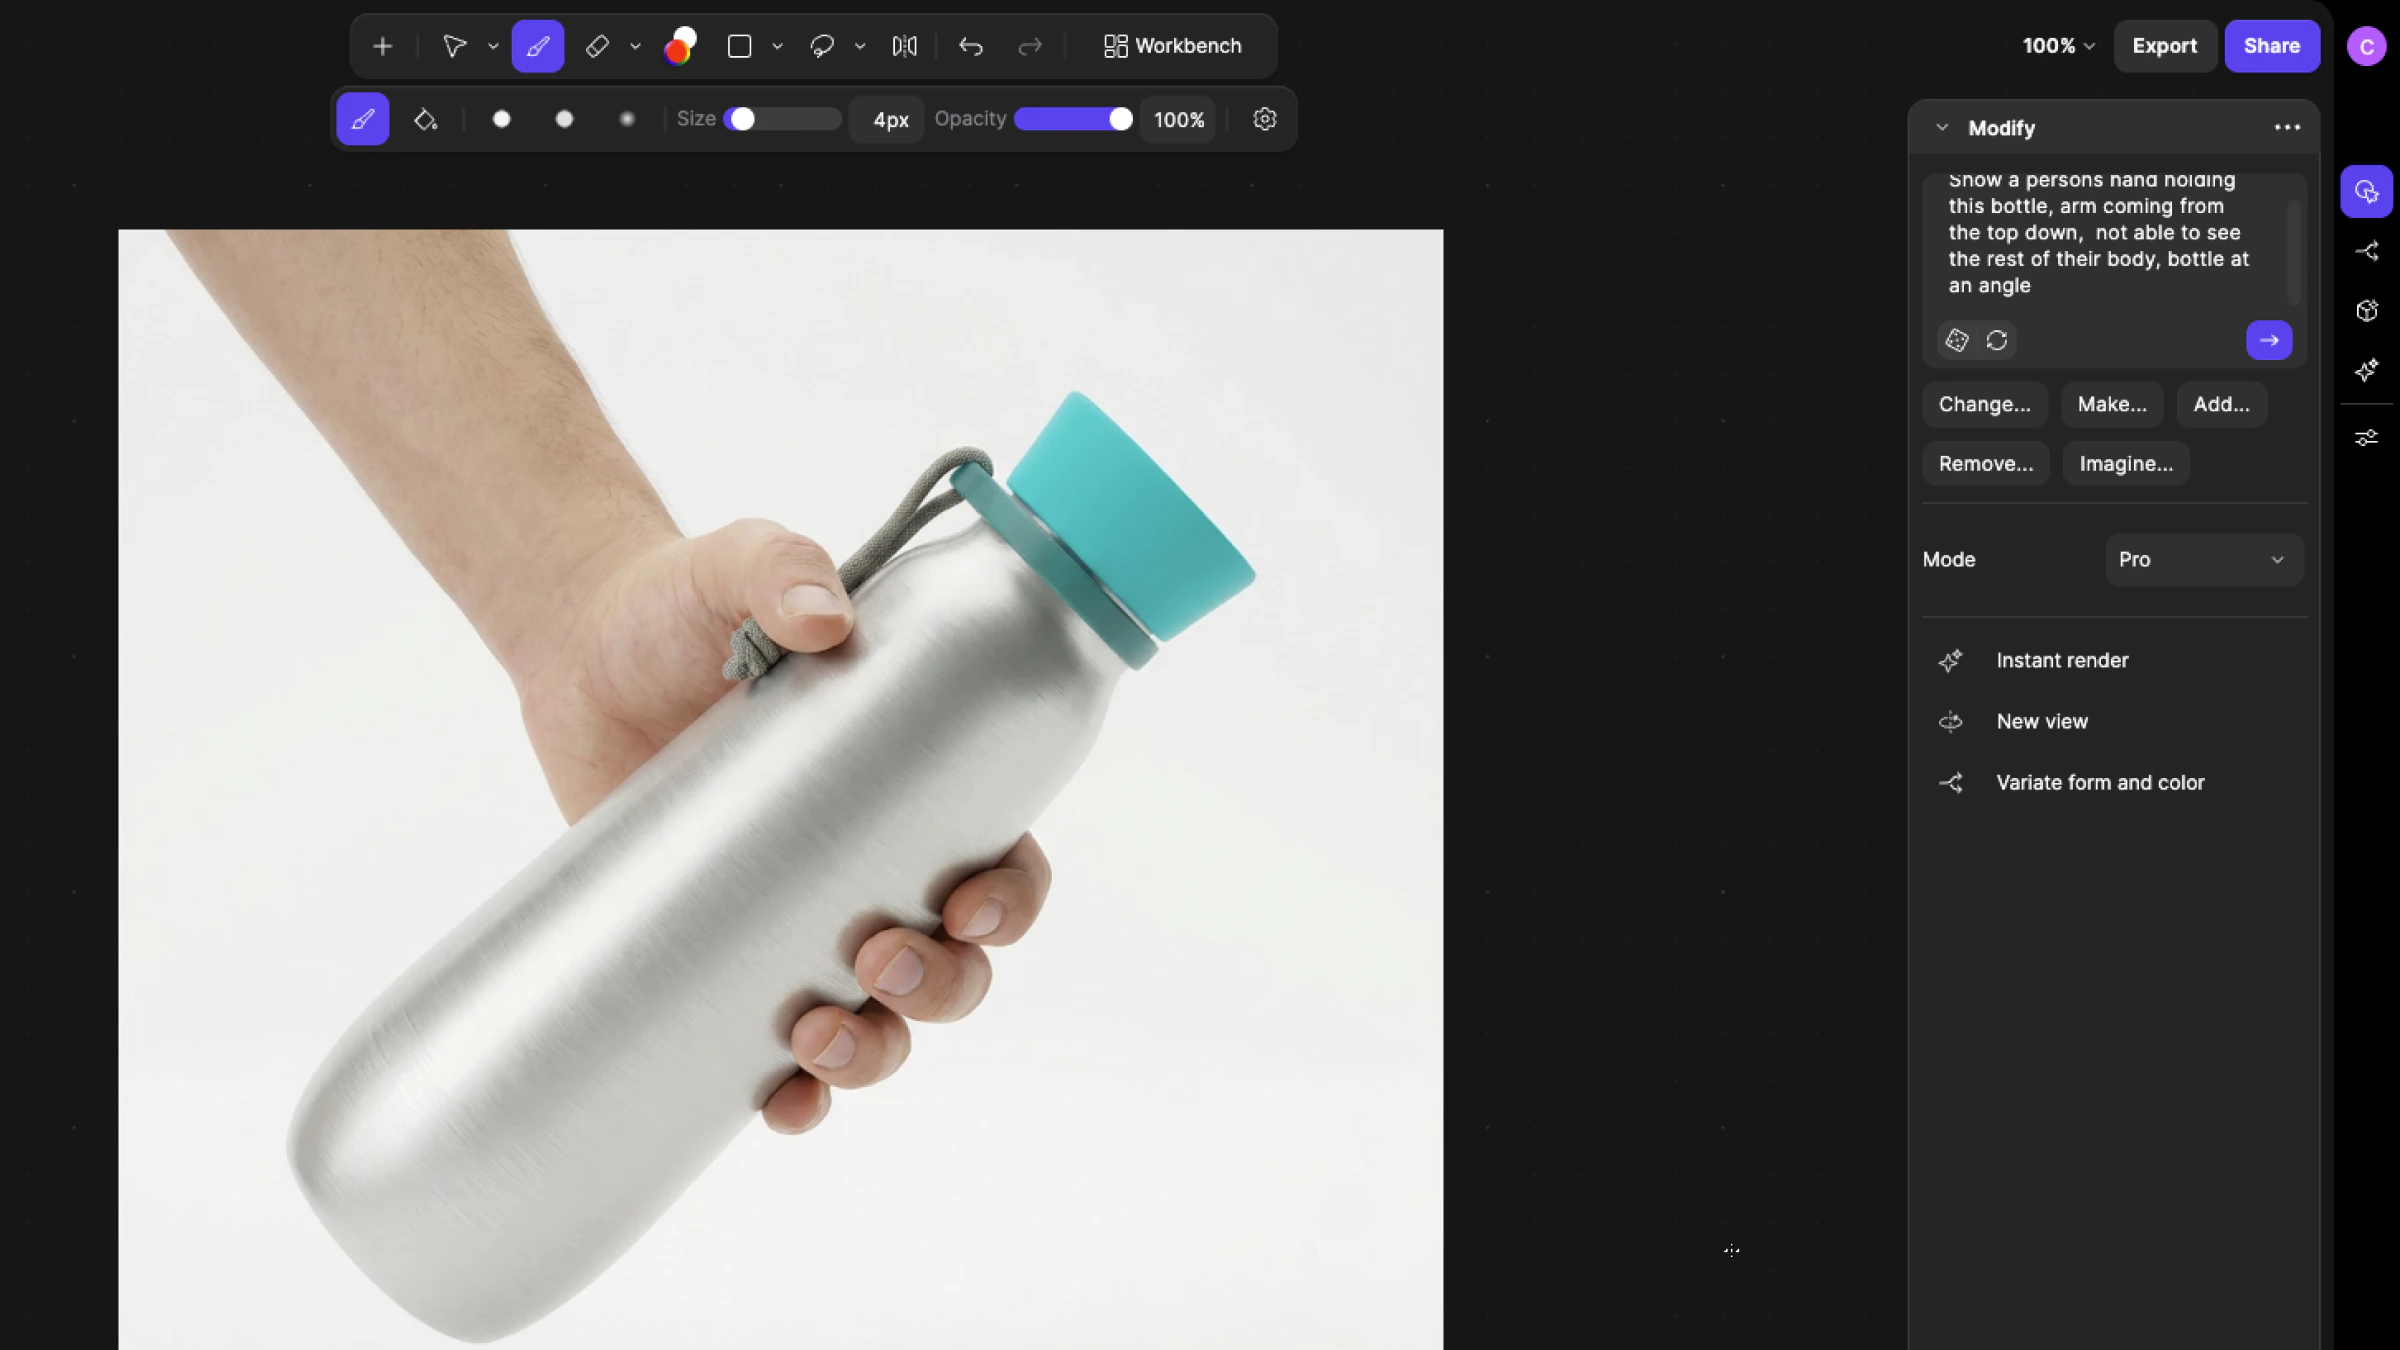
When Studio opens, the modify panel will open by default on the right side of the screen. Use the workflow sidebar in order to access it again from the other workflows.
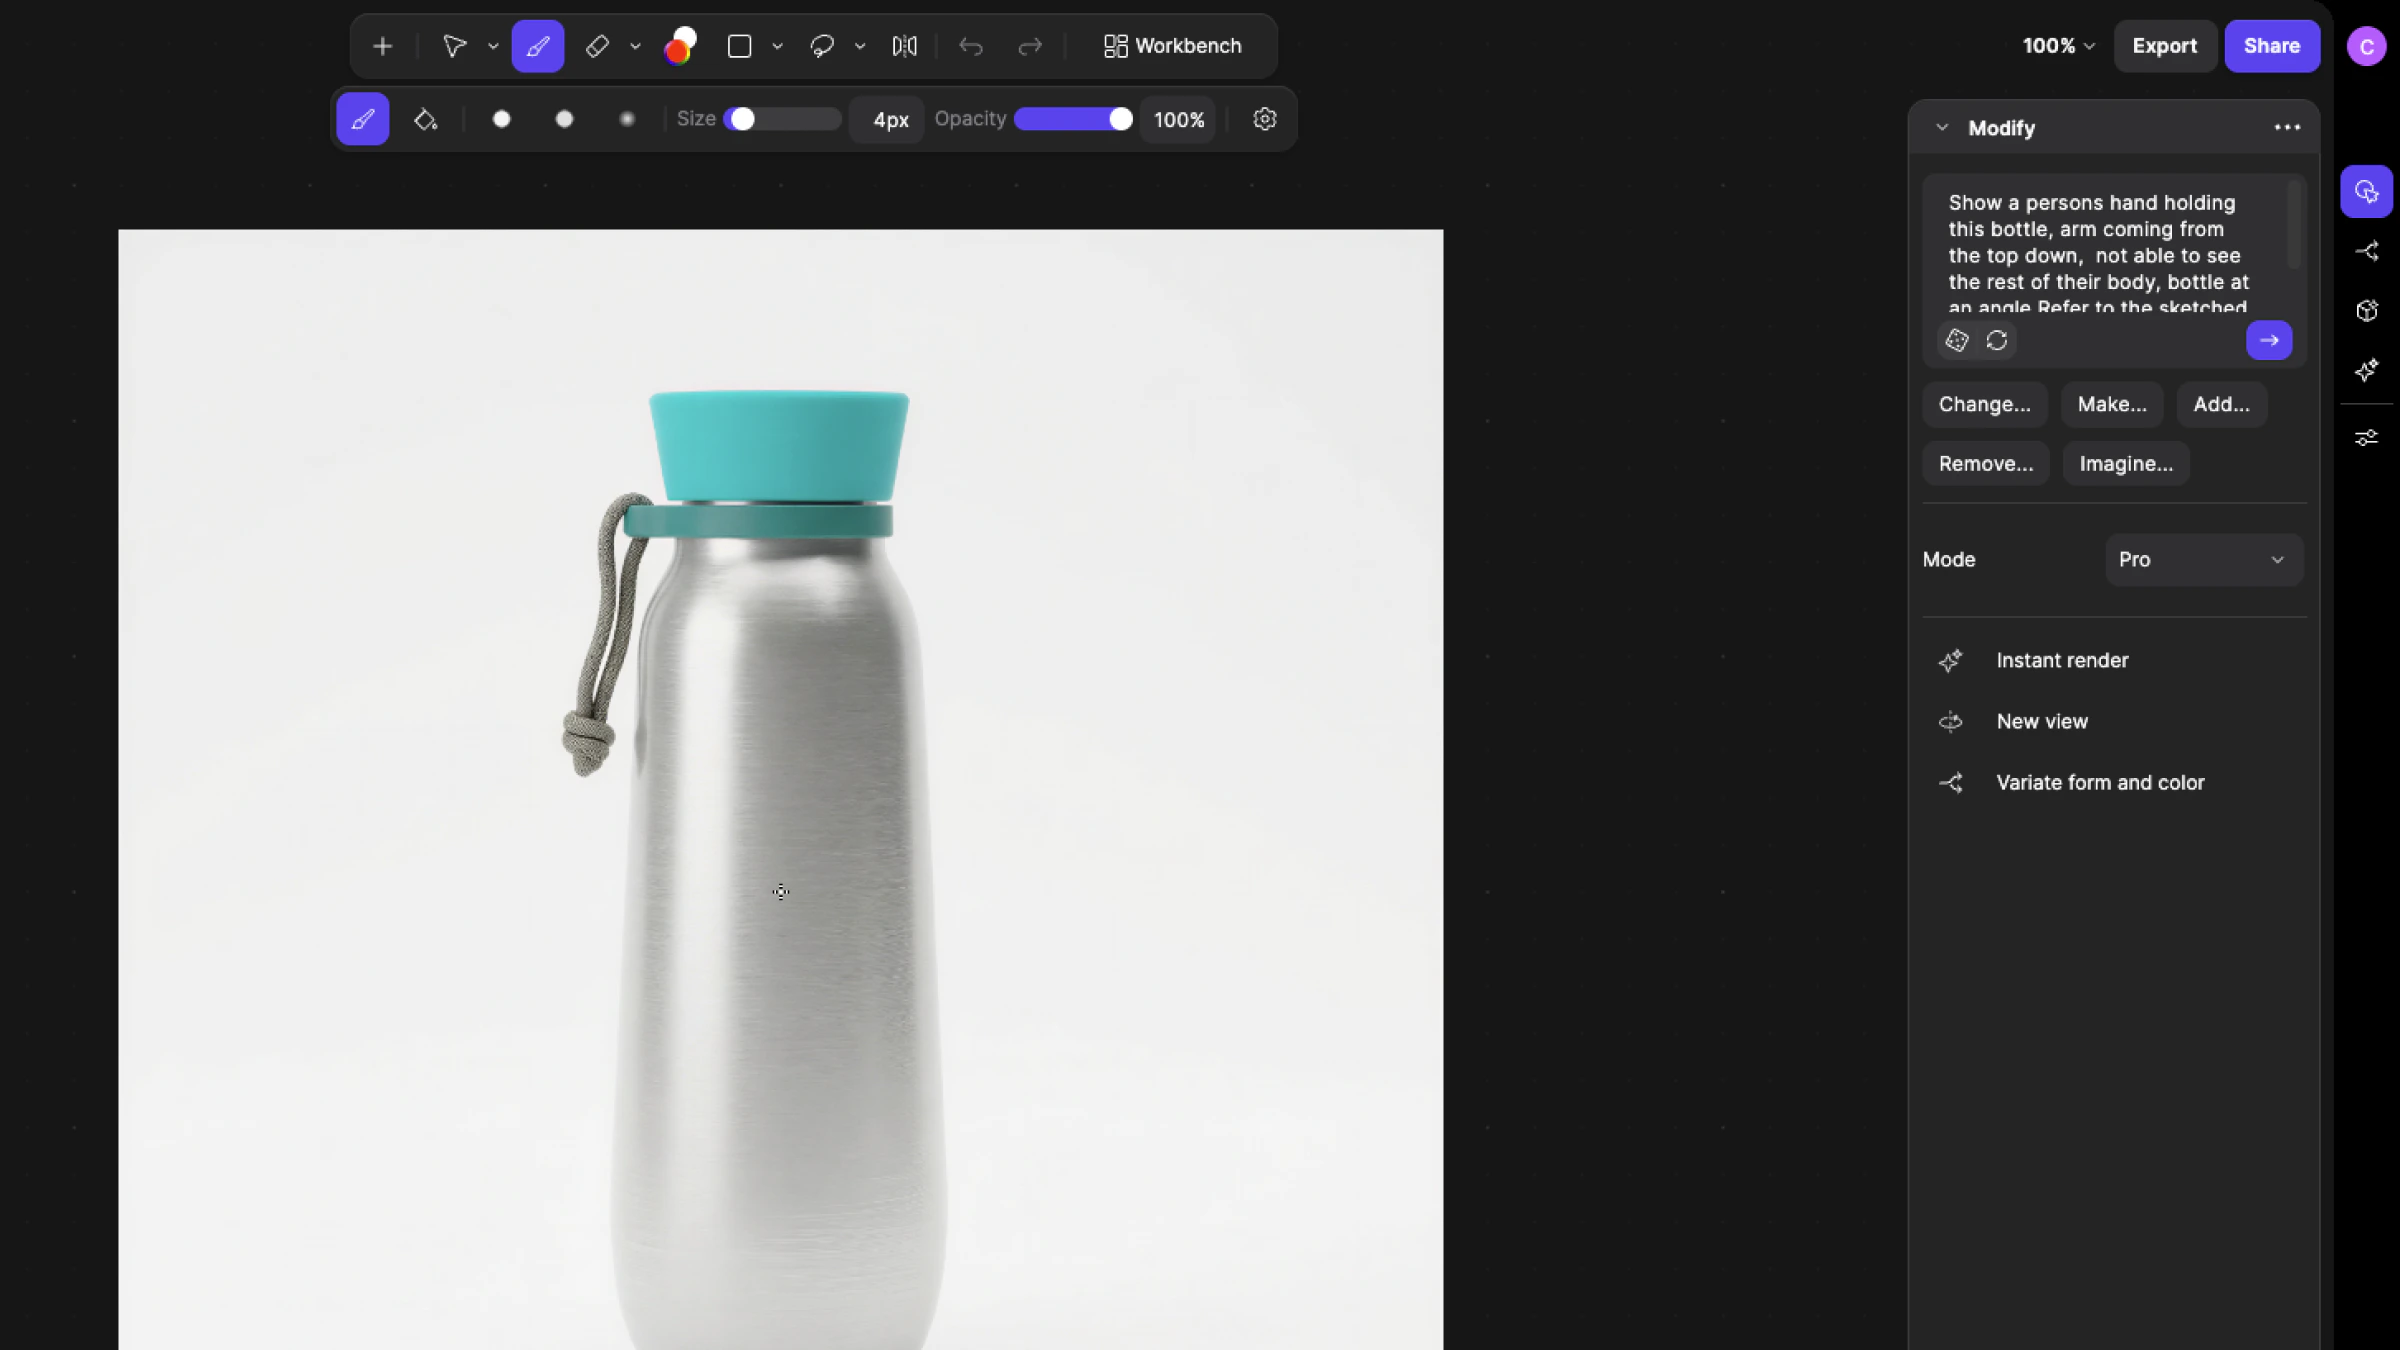
Enter your prompt using natural language, then click the purple arrow button to generate a result. It will appear in the results panel at the bottom right of the screen.
Best practices when prompting in Modify
- Use direct verbs: strong prompts start with action
- Change
- Replace
- Add / Remove
- Extend / Shorten
- Make
For example:
- “Replace the fabric upper with perforated leather”
- “Extend the heel tab and make it more angular”
- Be visually specific: avoid vague words like better, modern, or interesting.
- For example:
- Instead of “Make it more premium”
- Prompt “Replace plastic housing with anodized aluminum, chamfer the frame
- For example:
- Preserve what should stay: if something must remain unchanged, say it
- For example:
- “Change the midsole to foam, keep the upper unchanged”
- “Adjust the proportion of the handle, keep material and color the same.”
- For example:
- Reference images directly: you can reference images in your canvas using @ + image number.
- For example:
- “Apply the material from @2 to the chair in @1.”
- “Use the color palette from @3 on the product in @1.”
- “Blend the form language of @2 into @1.”
- For example:
- Annotate to prompt: use red line annotation within your image to visually indicate parts of your design to Vizcom.
- For example:
- “Change the red circled area to a leather texture. Remove the red annotation when done.”
- For example:
Tips
Next Steps
- Try @ references to transfer a material, color, or style from one image to another.
- Use annotations to target a specific area, then prompt the change for that region.