

Who this is for
Designers who already have concept images, renders, or a reference video in a Workbench and want motion out of them. No video editing or 3D experience needed. You’ll usually land here after you’ve generated or uploaded at least one image node.What you’ll have at the end: a looping video in your Workbench, ready to regenerate, refine, or export.
1
Add an Animate Block and attach references
The Animate Block is the control center for the animation — mode, references, prompt, and settings all live on it.Add the block in one of two ways:
- Click + in the Workbench toolbar and select Animate.
- Drag from an image or video node with the Pathfinder and drop into Animate.
2
Select a mode
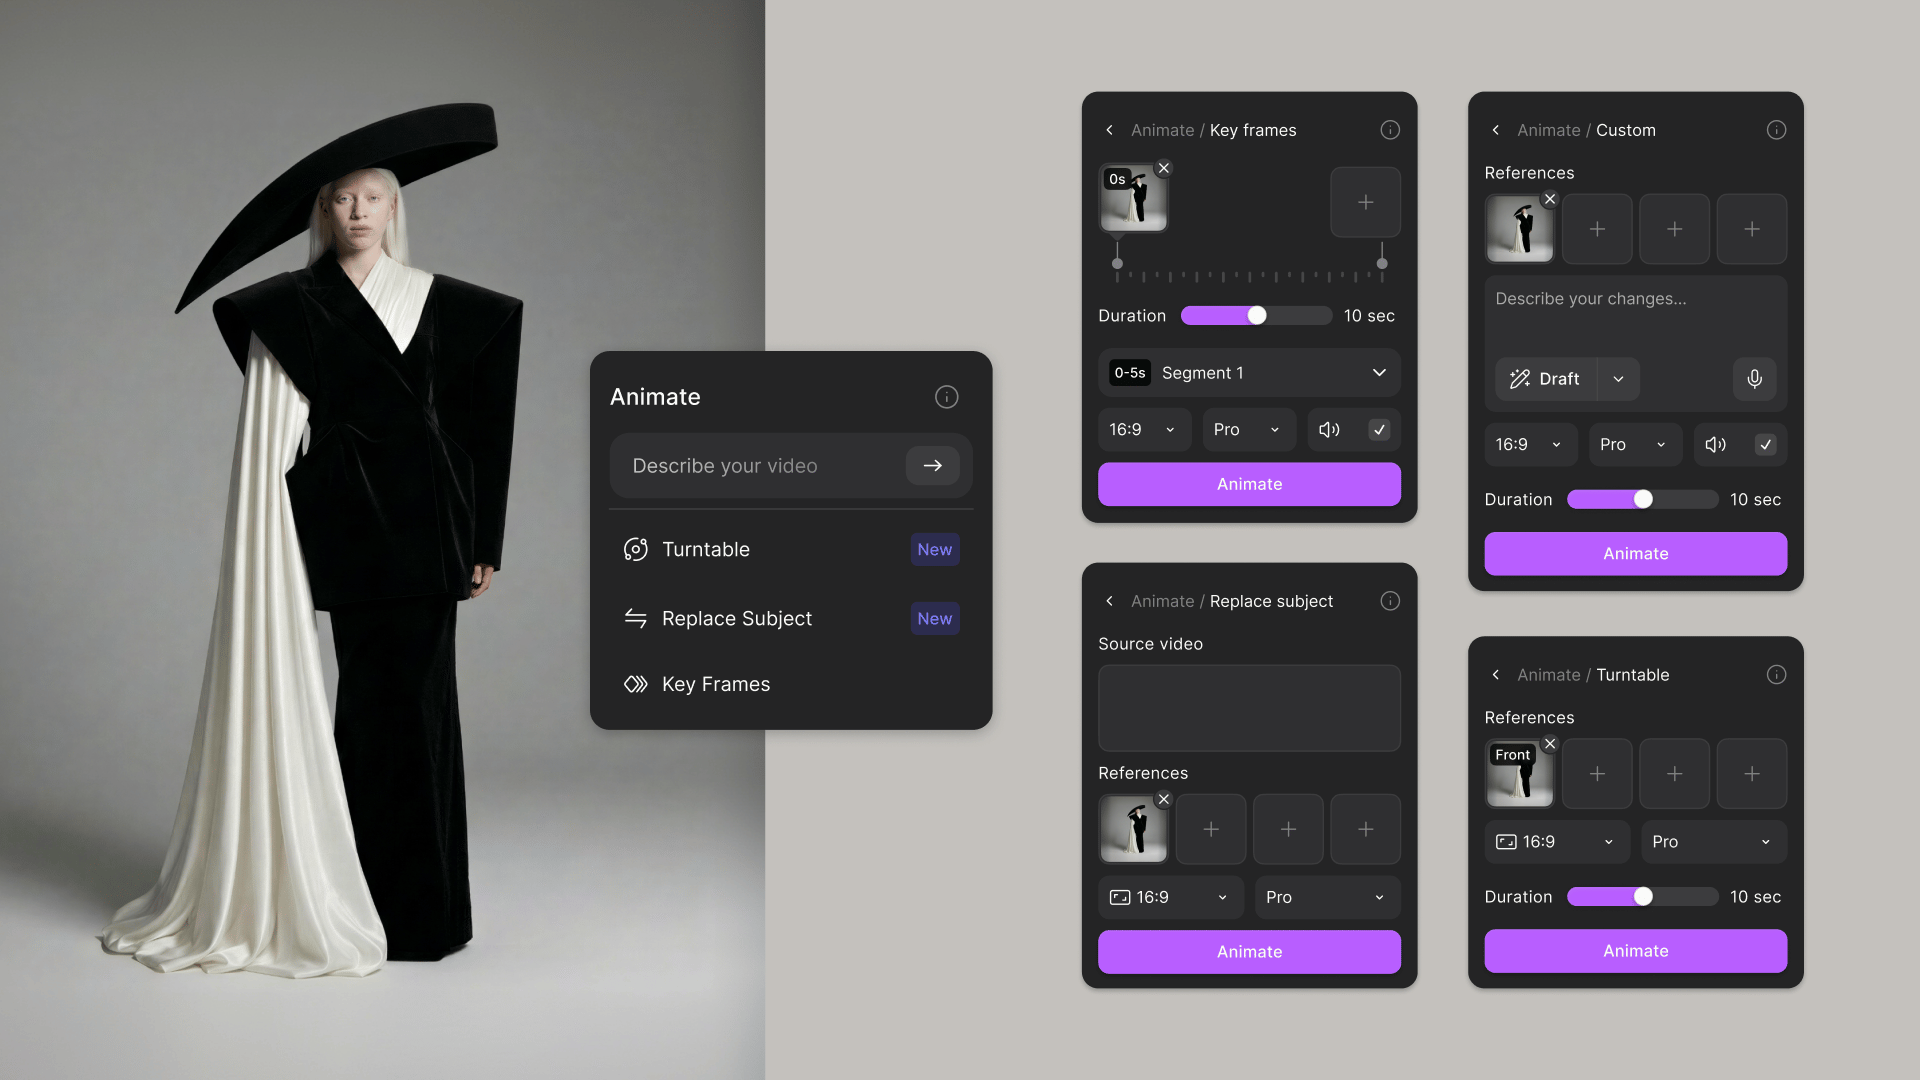
3
Add a prompt
Required in Custom mode, optional in Key Frames, unused in Turntable and Replace Subject.Write it faster
- Draft — builds a prompt from the reference assets you’ve already connected.
- Enhance — rewrites a simple instruction into a prompt tuned for higher quality animation.
@ to mention a connected asset directly. Images and collections from your asset library work here too.What to describe- Motion or interaction
- Environment or context
- Cinematic feel
4
Set animation type and duration
Type trades generation time against quality. The options depend on the mode you picked.Duration: select the animation length available for the animation type you chose.
- Custom, Turntable, Replace Subject
- Key Frames
- Animate Pro — better cinematography and motion physics, longer generation time.
- Animate Fast — much faster, uses fewer credits.
5
Generate the animation
Click Animate. Your video appears directly in the Workbench, auto-plays and loops by default, and stays ready to regenerate or refine.
Animation modes
Key Frames
Generates the frames in between a start frame and an optional end frame.- Attach: up to 2 images: a start frame and an end frame.
- Prompt: optional.
- Animation types: Standard or Turbo.
Turntable
Creates one continuous orbit around your design.- Attach: multiple views of one concept, up to 8 assets including 1 optional video.
- Prompt: not used.
- Animation types: Animate Pro or Animate Fast.
Replace Subject
Swaps the subject of a reference video for your concept.- Attach: a reference video plus views of your concept, up to 8 assets in total.
- Prompt: not used.
- Animation types: Animate Pro or Animate Fast.
Custom
Pulls environment, subject, detail, and motion from your references.- Attach: up to 8 assets, including 1 optional video.
- Prompt: required. Type
@to mention a connected asset directly. Images and collections from your asset library work here too. - Animation types: Animate Pro or Animate Fast.
Usage and credit costs
- Animate Pro
- Animate Fast
- Standard V2
- Turbo V2
Tips and FAQ
How many assets can I connect?
How many assets can I connect?
- Key Frames takes 2 images: a start frame and an end frame.
- Custom, Replace Subject, and Turntable take up to 8 assets, including 1 optional video.
Next steps
Setting views
Label reference images for better consistency.
Credits and limits
Generation limits by plan.
Upscale and export
Upscale, export, and share video from the Workbench.