

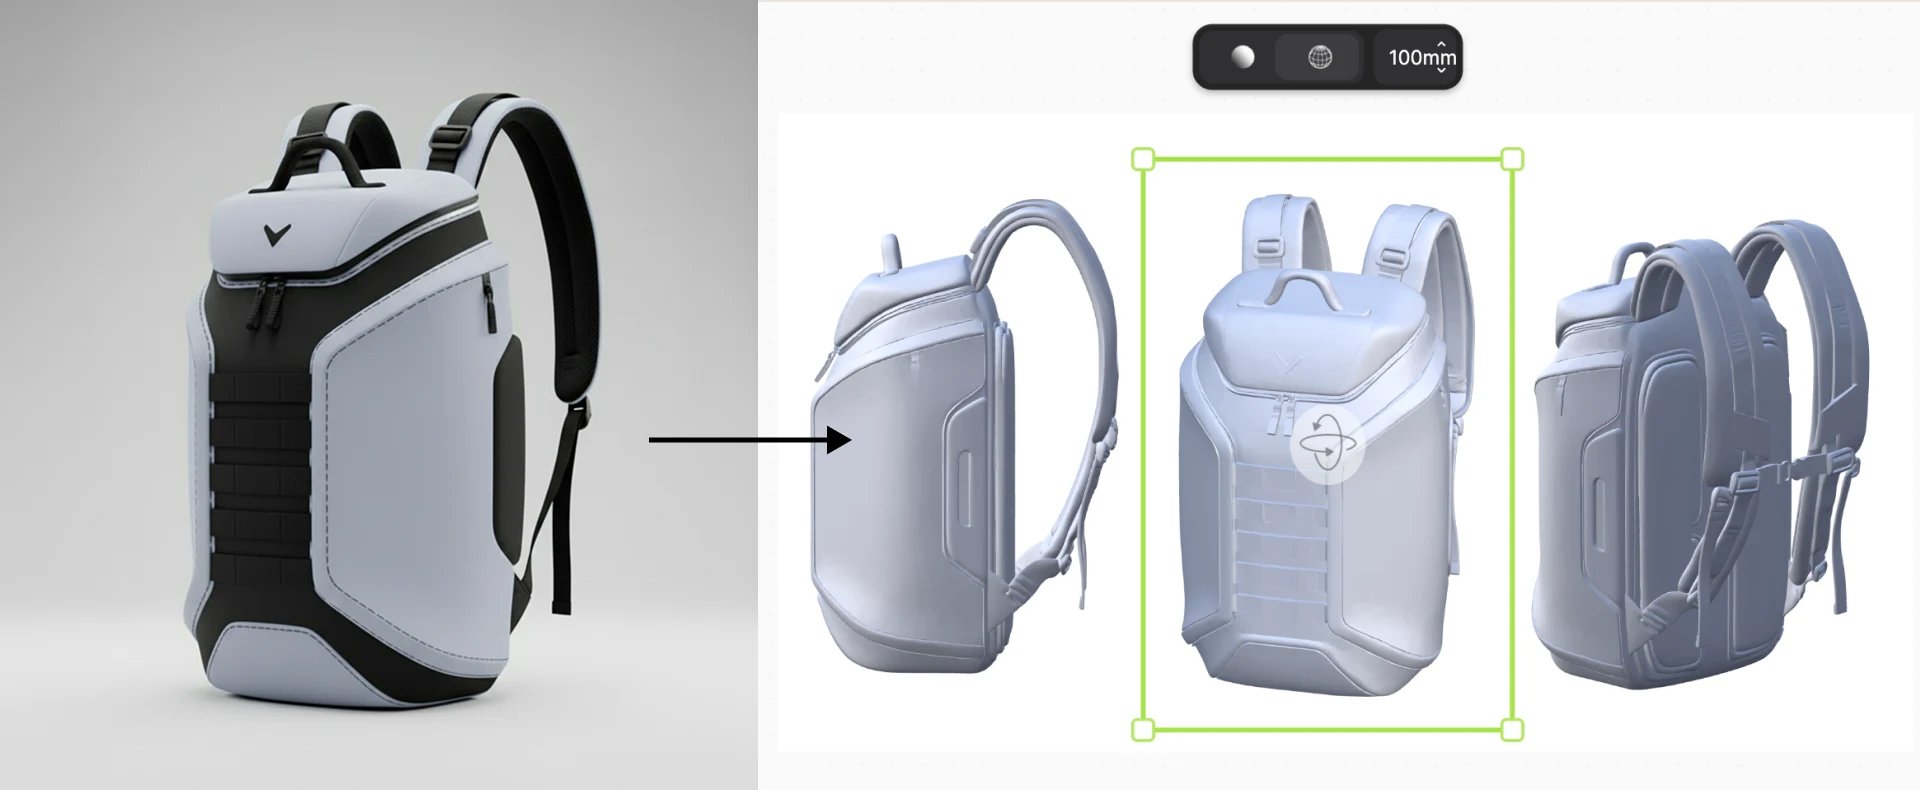
A backpack render and the 3D model made from it, from three angles.
Steps
- Open Settings > Account > Plugins and click Connect on the Autodesk Fusion card (Autodesk Fusion).
- Make Front, Left, Rear and Right views of the render with New view.
- Click Insert (+) > Make 3D and connect the views to its slots. Front must be filled (Make 3D).
- Choose a Mode, Mesh detail and Texture, then click Generate.
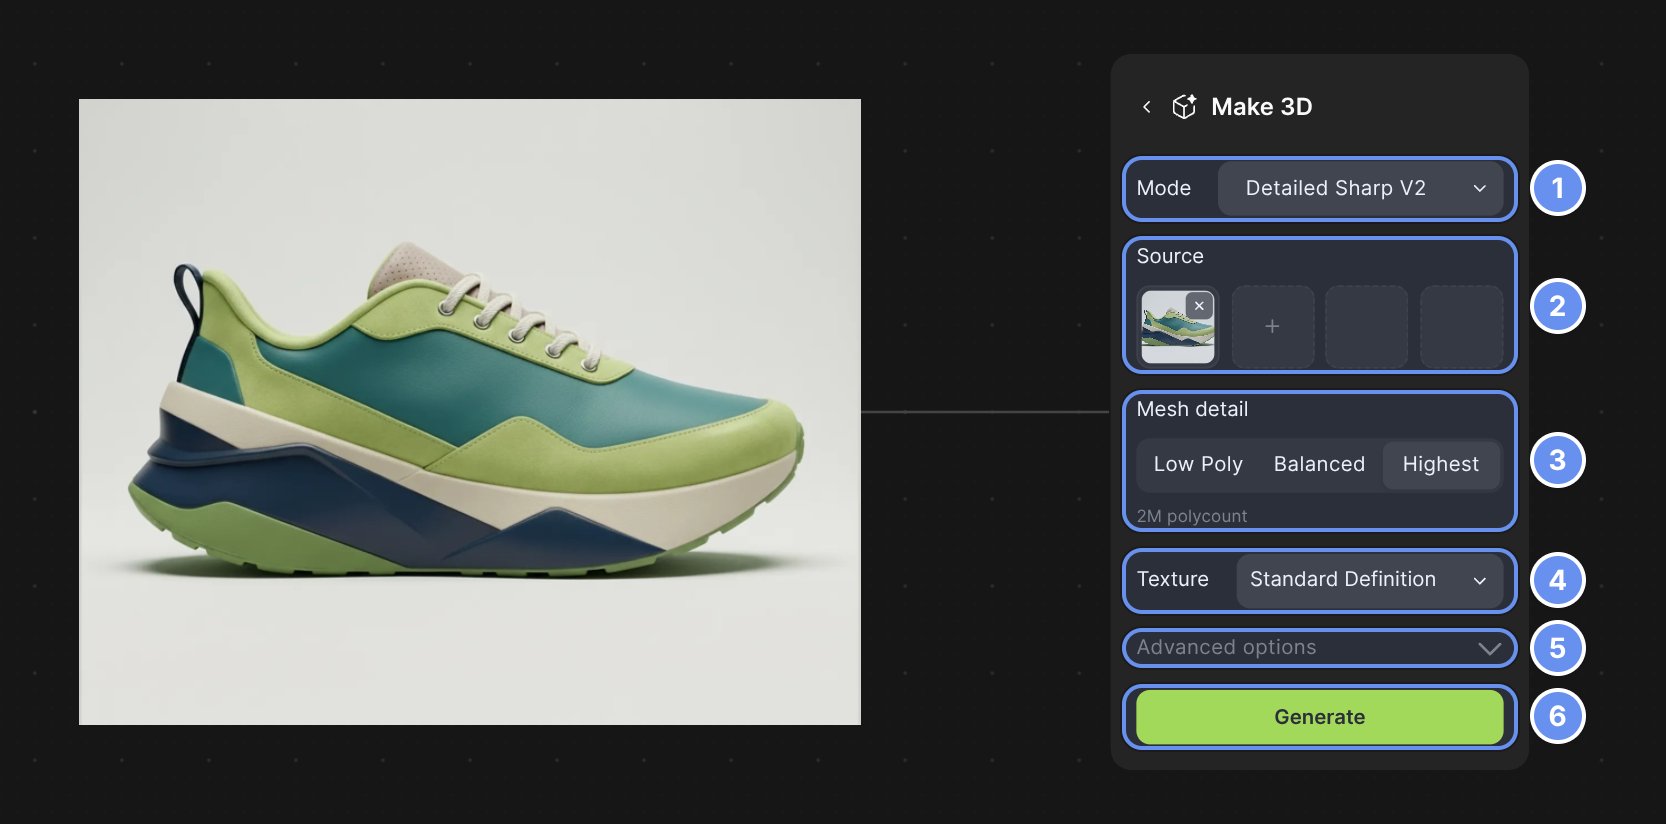
Mode (1), source images (2), Mesh detail (3), Texture (4), Advanced options (5), Generate (6).
- Drag the 3D card to orbit, and set Render mode to Wireframe or Solid to check it (3D models).
- Right-click the card, choose Add to asset library, then drag the model onto a Studio canvas from the Library tab.
- Right-click the 3D layer, choose Export to Autodesk Fusion, pick a hub and project, and click Export to.
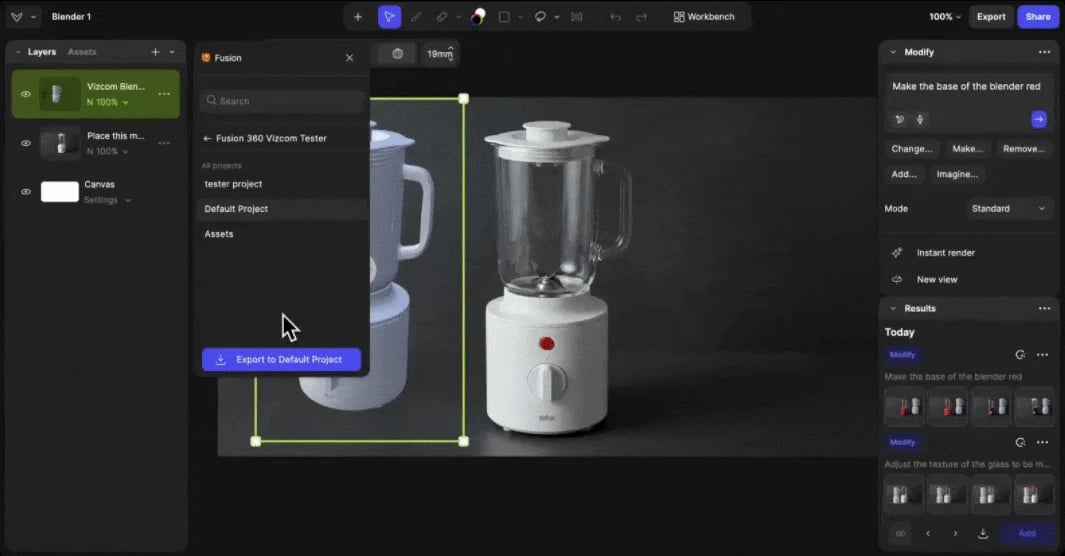
Export to Autodesk Fusion from a 3D layer in Studio.
- Send changes back from Fusion: click Utilities > Add-Ins > Vizcom, select the bodies and click OK.
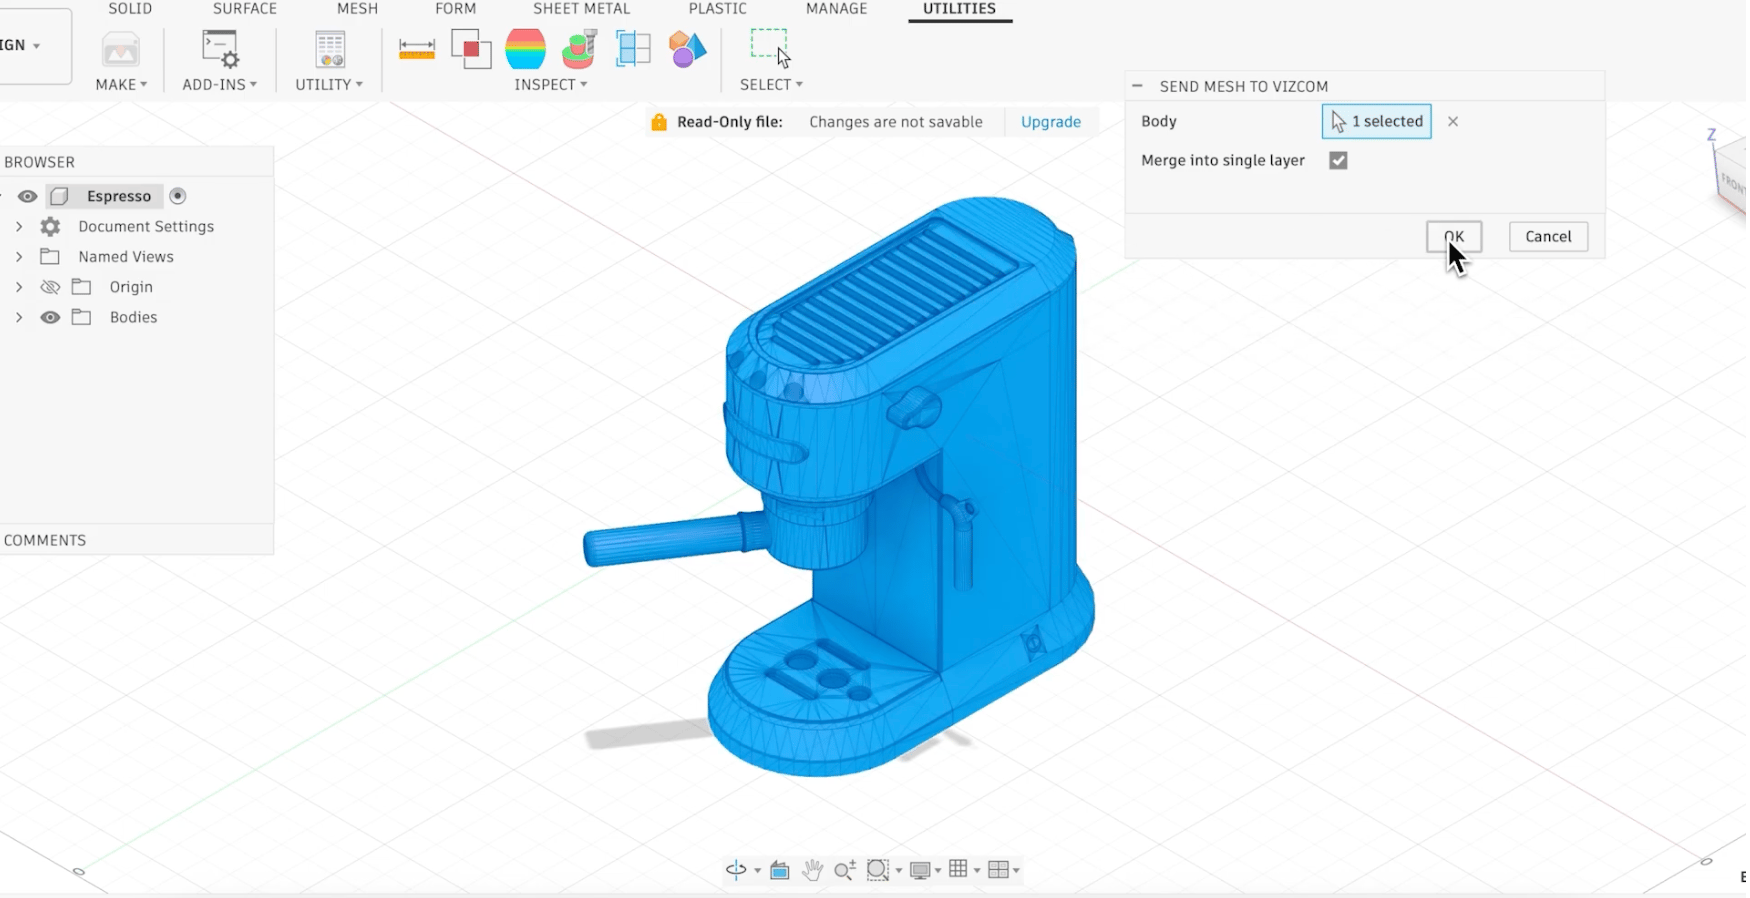
Sending a body from Fusion back to Vizcom.
Good to know
- Make 3D works on every plan. Sending to Fusion and exporting 3D files need a paid plan.
- The model arrives in Fusion as a mesh, not a solid: convert it before you add dimensions and tolerances.
- More detailed modes and textures cost more (Credits).
Related
Make 3D from 2D
Modes, options and 3D export.
Autodesk Fusion
Connect and troubleshoot the plugin.
Presentation views
Make consistent views first.
Make 3D
Every Make 3D option.