
You’ll end with one hero render at 4K or larger, plus a board that shows every step.
Four stages of one running shoe in a row, labeled Sketch, Color blocking, Shading and Hero render: a clean line sketch, a flat color-blocked drawing, a shaded drawing with soft gradients, and a photoreal hero render in taupe suede and cream mesh.

One running shoe from line sketch to hero render.

You need: a side or three-quarter sketch, with the product filling the frame.

Steps

  1. Click Insert (+) > Upload a file (I), or Upload from phone (/) for a paper sketch.
  2. Double-click the sketch to open Studio, scale it with Transform (M) and erase stray lines (E).
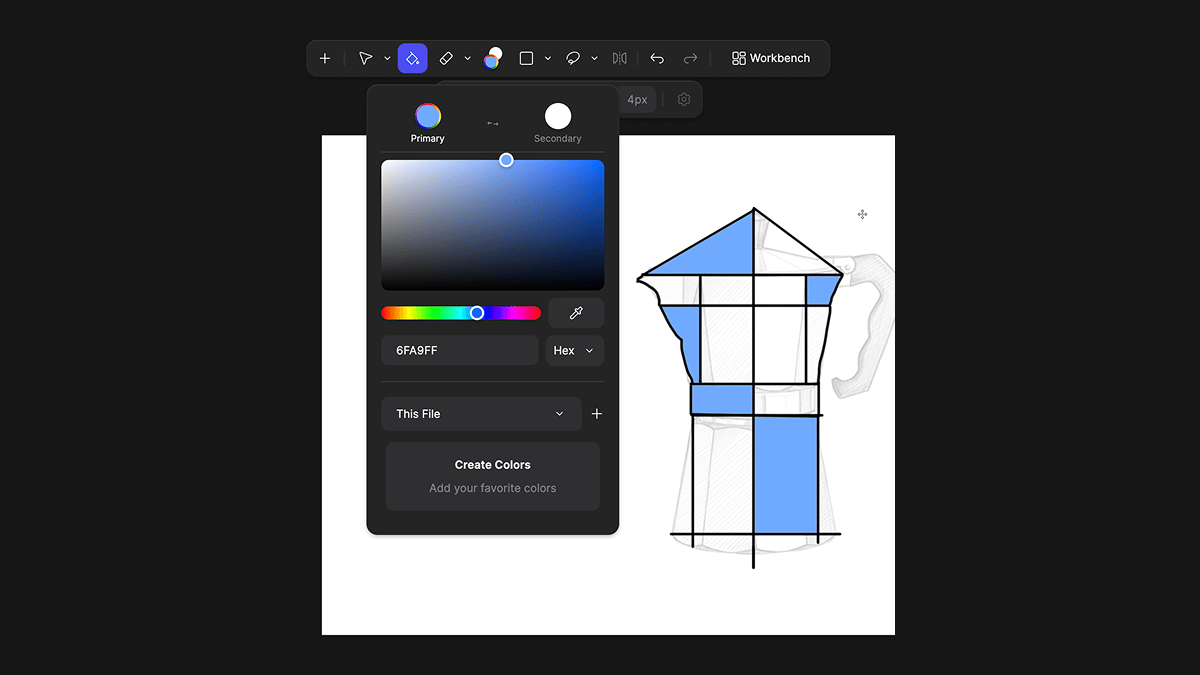
Studio with the Paint Bucket tool active and the color picker open: Primary and Secondary swatches, a color field, a hue slider, an eyedropper and a hex value. The coffee-pot sketch behind it has several areas filled with blue.

Blocking in the main surfaces with the Paint Bucket before rendering.

  1. Select the sketch, press Q for Modify, and name the product, materials, colors and background.
  2. Or skip the prompt: drag from the + handle, choose Modify > Instant Render and click Render.
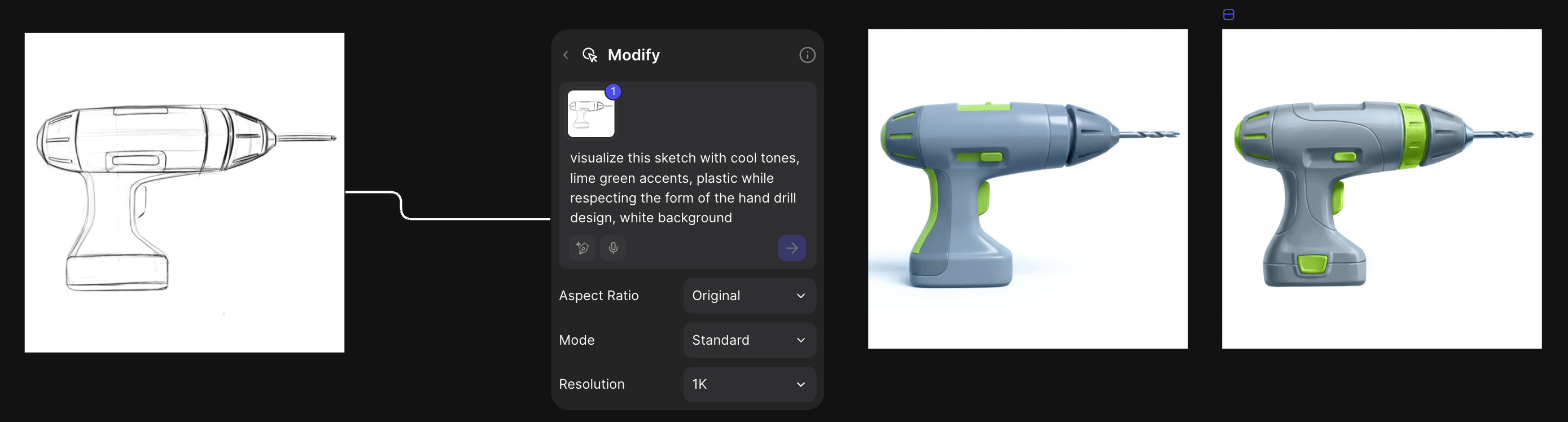
A pencil sketch of a cordless drill connected to a Modify block with the prompt: visualize this sketch with cool tones, lime green accents, plastic while respecting the form of the hand drill design, white background. Aspect Ratio Original, Mode Standard, Resolution 1K. Two grey and lime-green drill renders sit to the right.

A drill sketch, the Modify block with the prompt, and two renders.

  1. Match a team look (optional): press Y for the Smart Dropper, choose Style, click the reference, then your render.
  2. Ask for one change per Modify block, ending with “Keep the same art style and leave the rest of the image unchanged.”
  3. Change one area only: in Studio, press G to select it and type the change in the Modify tab.
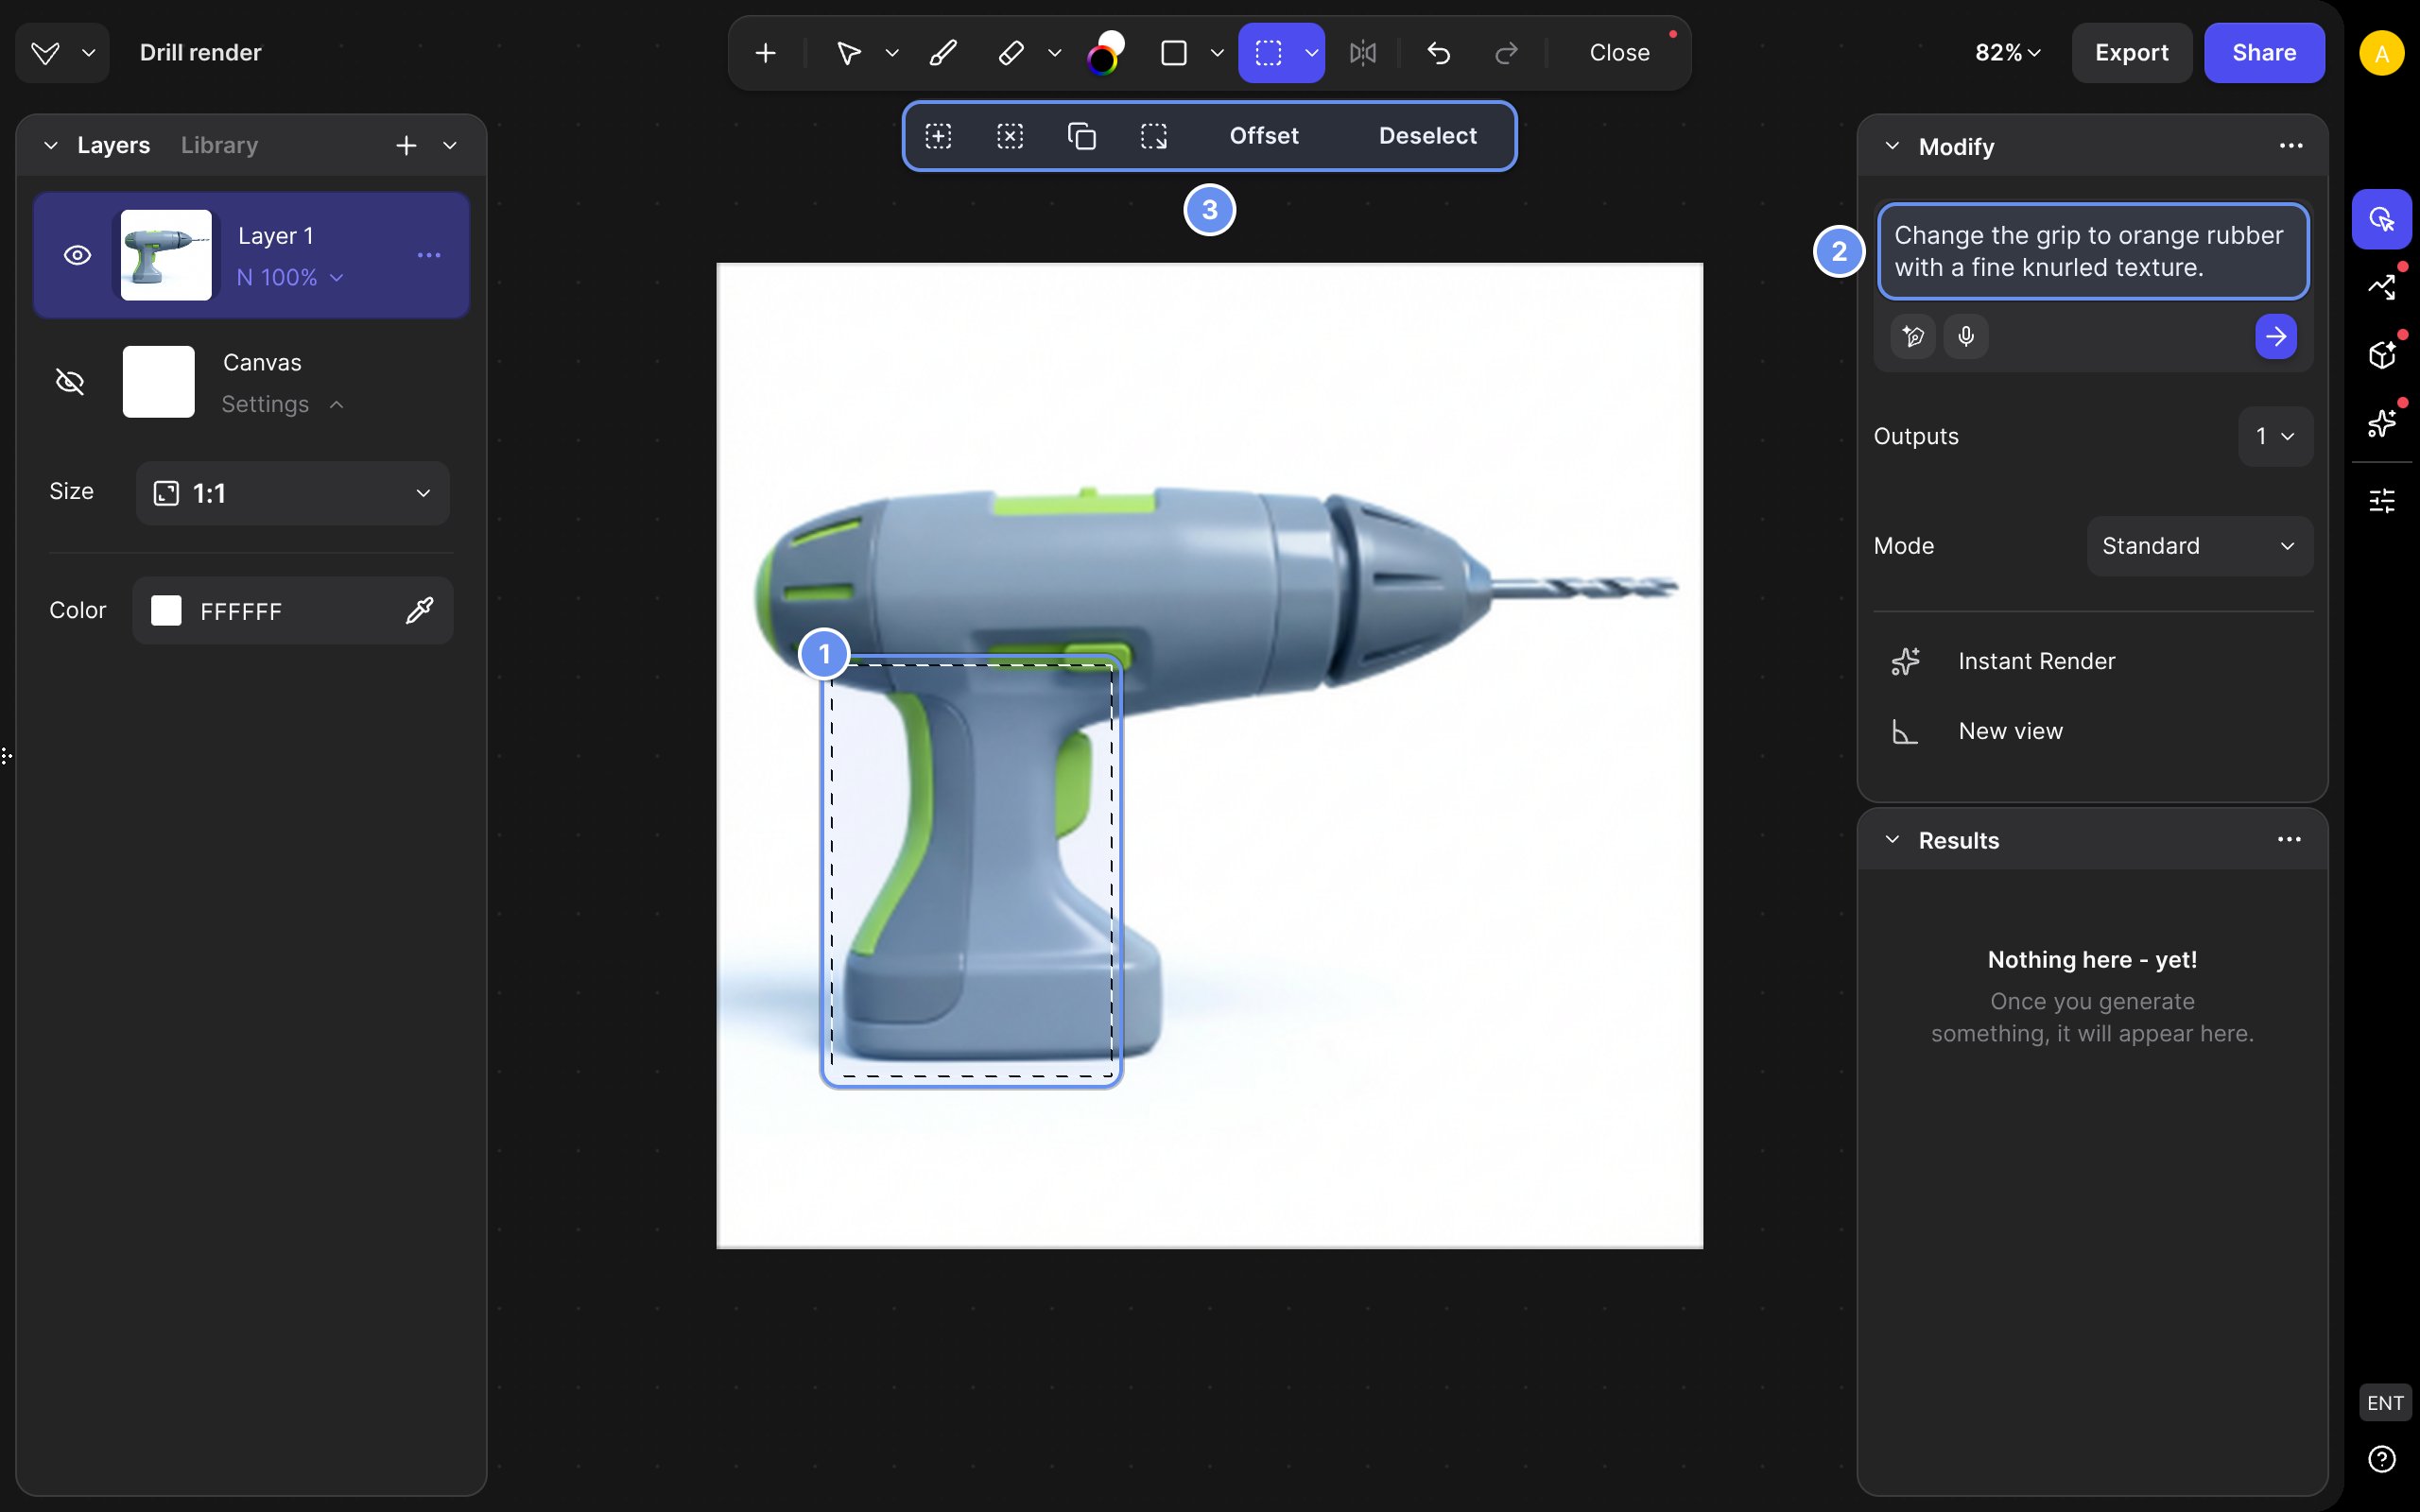
Studio with a dashed rectangle selection around the grip of a grey and lime-green drill render, marked 1. The Modify tab prompt, marked 2, reads: Change the grip to orange rubber with a fine knurled texture. The selection settings row, marked 3, has Add to selection, Remove from selection, Copy selection to layer, Invert selection, Offset and Deselect.

Selection (1), the change in the Modify tab (2), selection settings (3).
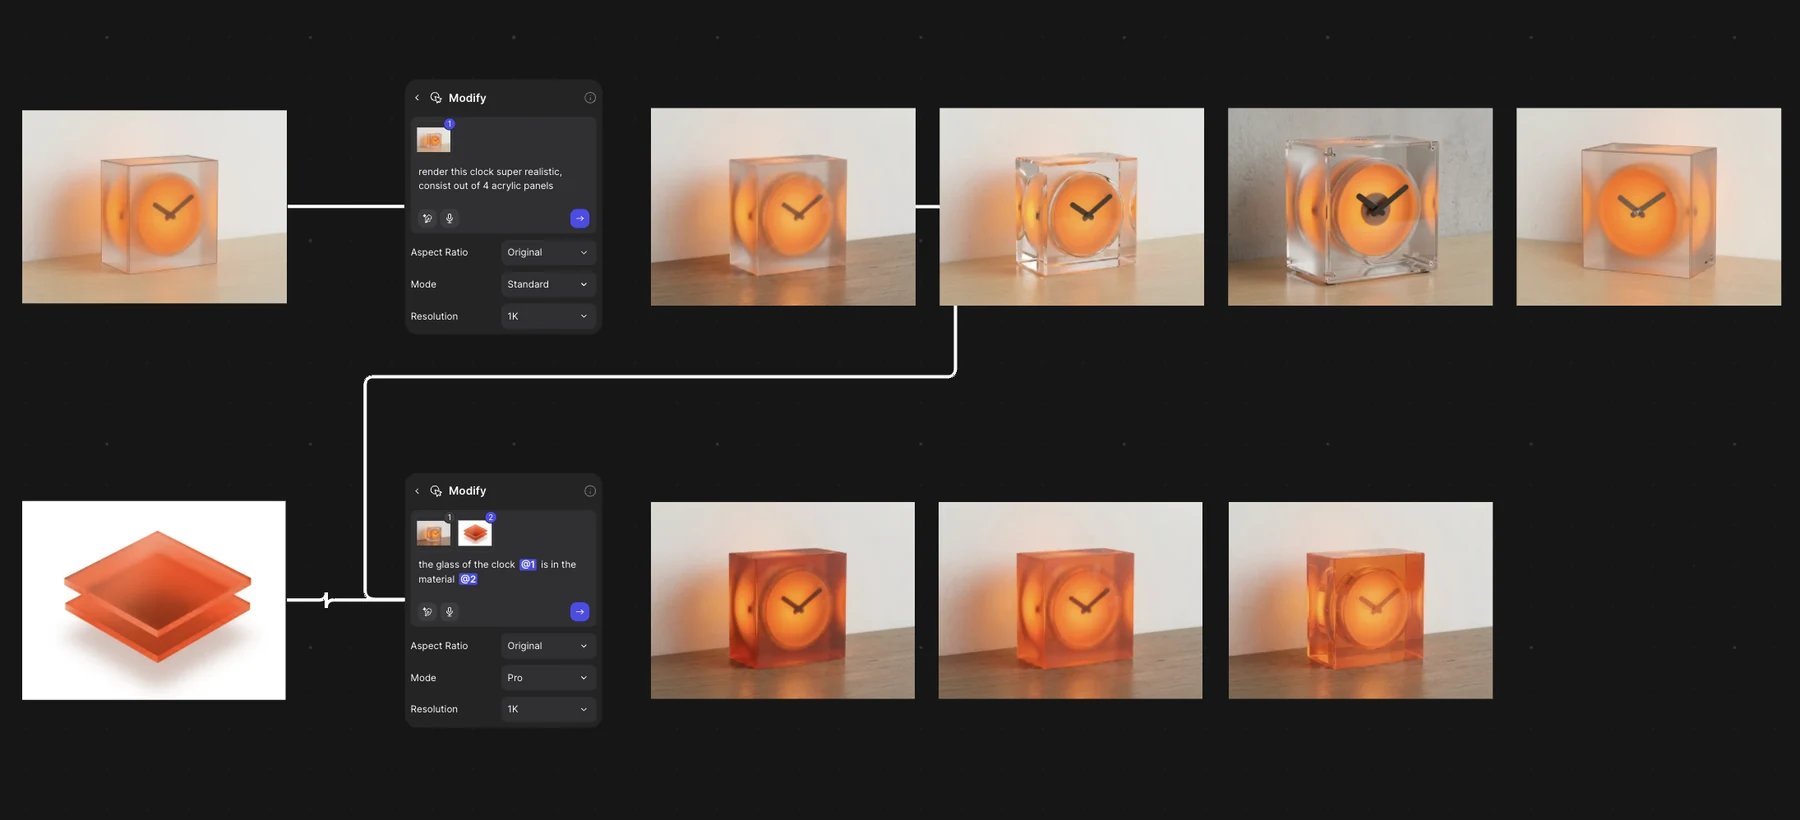
The Workbench with two chained Modify blocks. A photo of a frosted clock lamp feeds the first block (prompt: render this clock super realistic, consist out of 4 acrylic panels; Mode Standard), which produced four renders. One of those renders and an orange acrylic sample feed the second block (prompt: the glass of the clock @1 is in the material @2; Mode Pro), which produced three orange acrylic versions.

Each change is its own Modify block, so you can go back to any step.

  1. Set Resolution to 2K or 4K on the final block, or choose Quick actions > Upscale 4K (Upscale).
  2. Click Download > Export…, pick PNG and a Scaling size, then click Export 1 asset (Export).
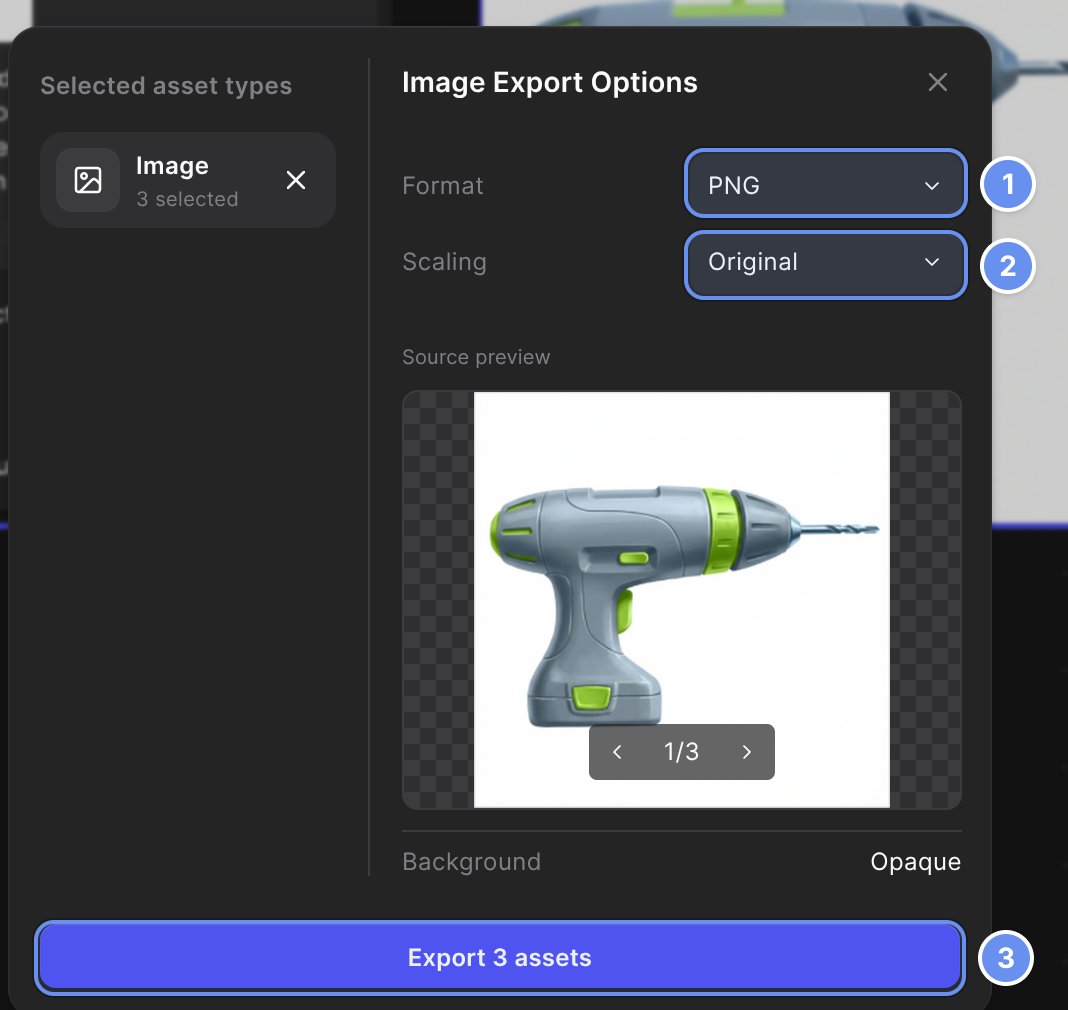
The Image Export Options window with Image, 3 selected, in the sidebar. The Format menu (PNG) is marked 1, the Scaling menu (Original) is marked 2, and the Export 3 assets button is marked 3. The source preview shows a drill render.

The export window: Format (1), Scaling (2) and the Export button (3).

  1. Select the sketch, blocks and results, press Shift + S to wrap them in a section, and click Share.

Good to know

  • Explore at 1K, which costs the least. 2K, 4K and Pro mode cost more (Credits).
  • The Instant Render tile in Insert (+) is on paid plans. Every plan can reach it from a Modify block’s list.

Turn a sketch into a render

Every way to render a sketch.

Write prompts that work

Prompt patterns for Modify.

Presentation views

Turn the render into views.

Modify

Every Modify option.