

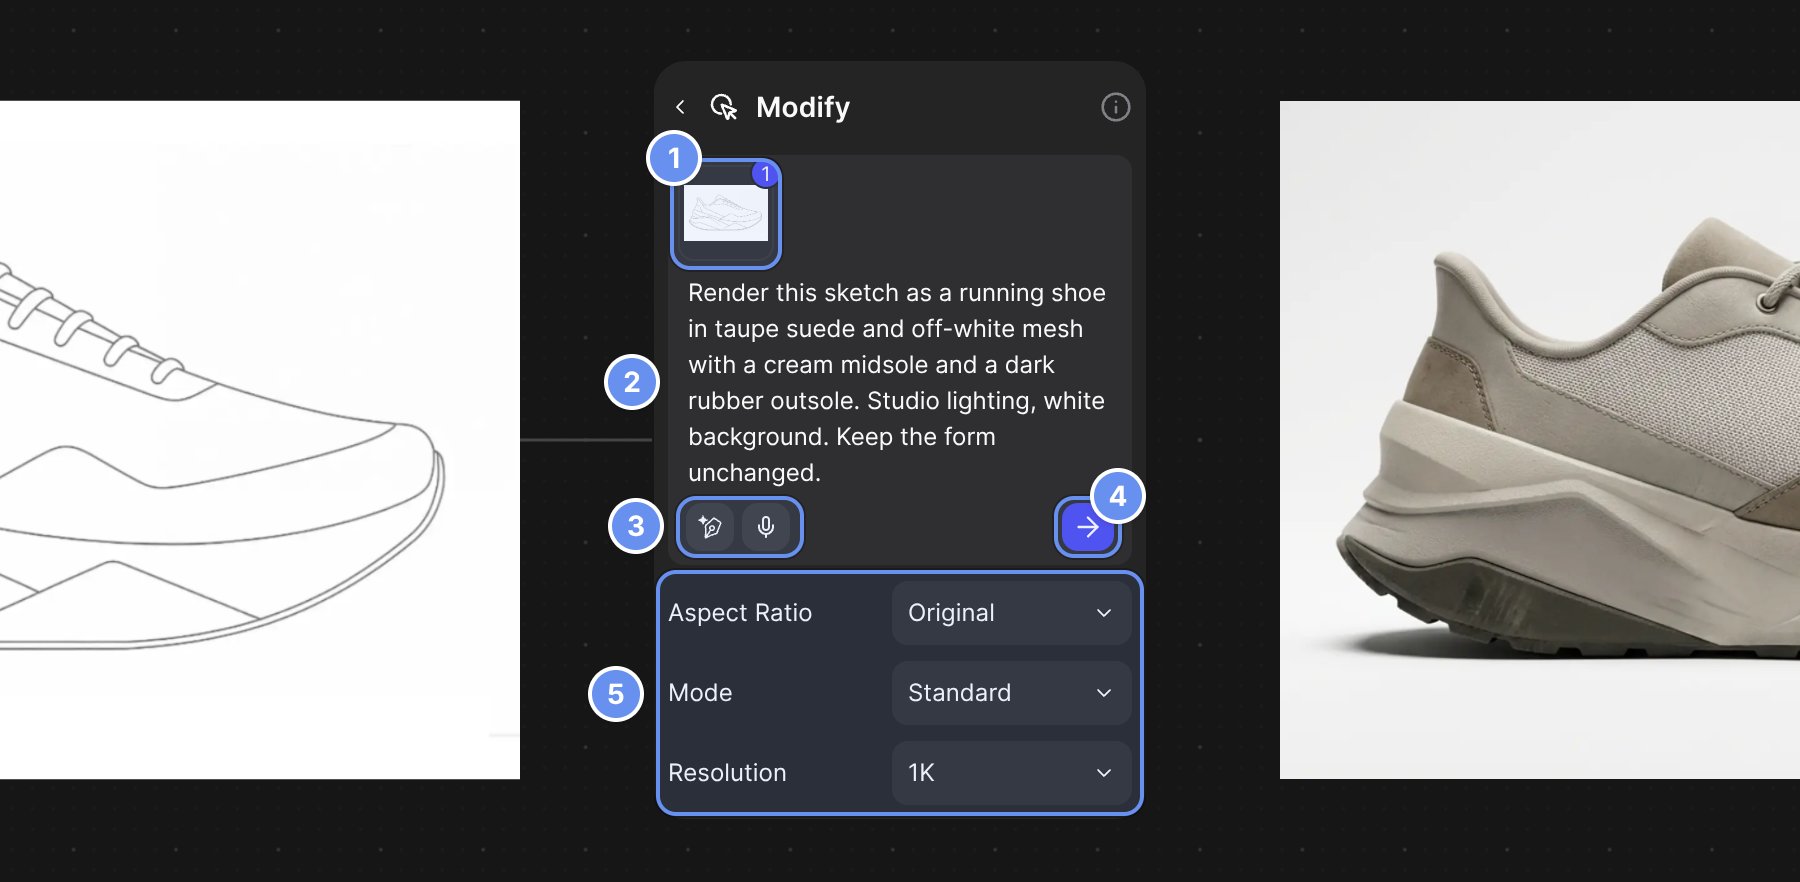
Connected image (1), prompt (2), Improve prompt and voice (3), generate (4), output settings (5).
Use Modify on the Workbench
1
Add a Modify block
Select up to 4 images and press Q to add a connected block 1.
2
Write what should change
Type the edit 2, or get help from Improve prompt and voice 3.
3
Set the output
Choose Aspect Ratio, Mode and Resolution 5.
4
Generate
Click the arrow 4 or press Enter.
5
Keep going
Select the result and press Q to change it again.
Use Modify in Studio
Double-click an image, type in the Modify tab and click the arrow. Select an area first to change only that part.Options
Examples
Prompt: “Change the chair to red plastic.” Prompt: “Make this daytime and golden hour and remove the lamp and candle.” Connect several images and refer to each by number: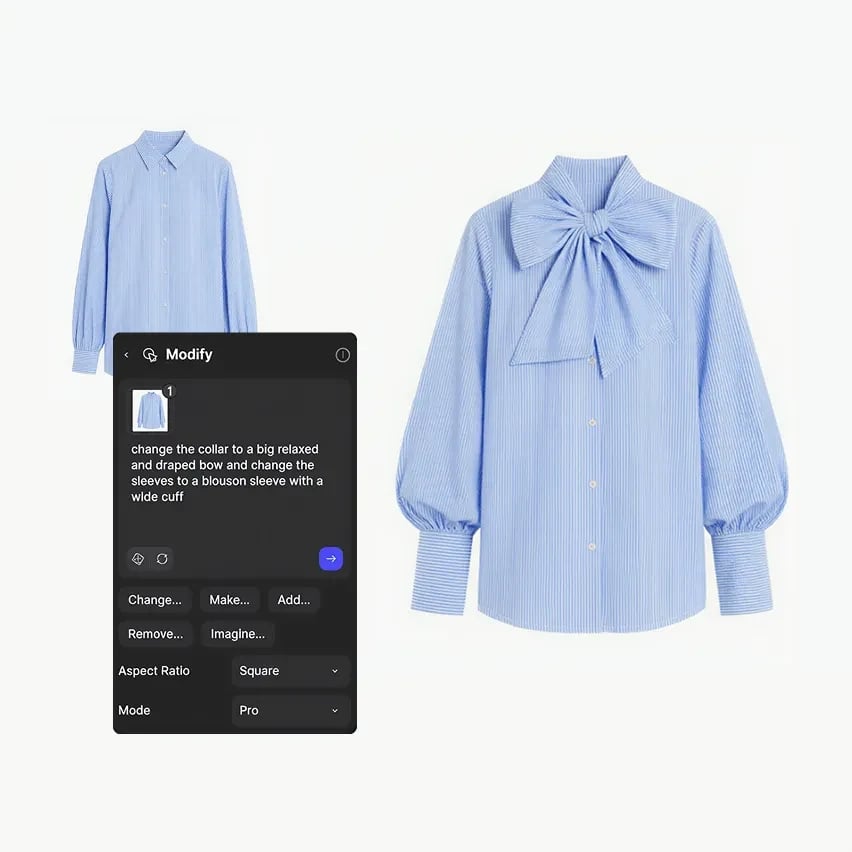
One image: a draped bow collar and blouson sleeves.
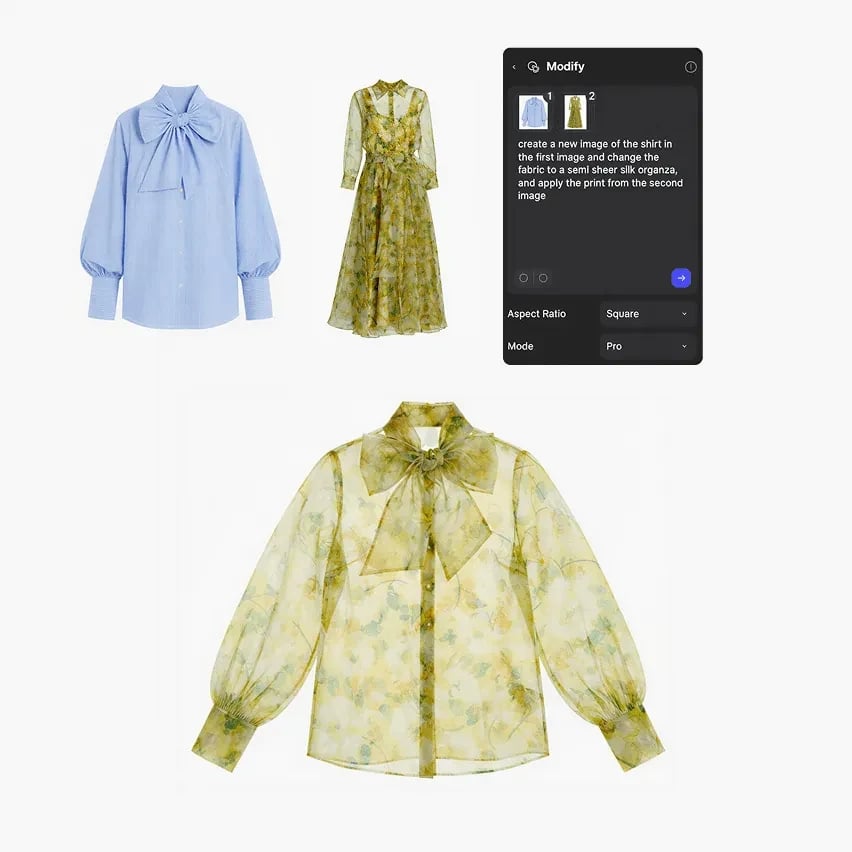
Two images: the shirt in @1 in sheer organza with the print from @2.
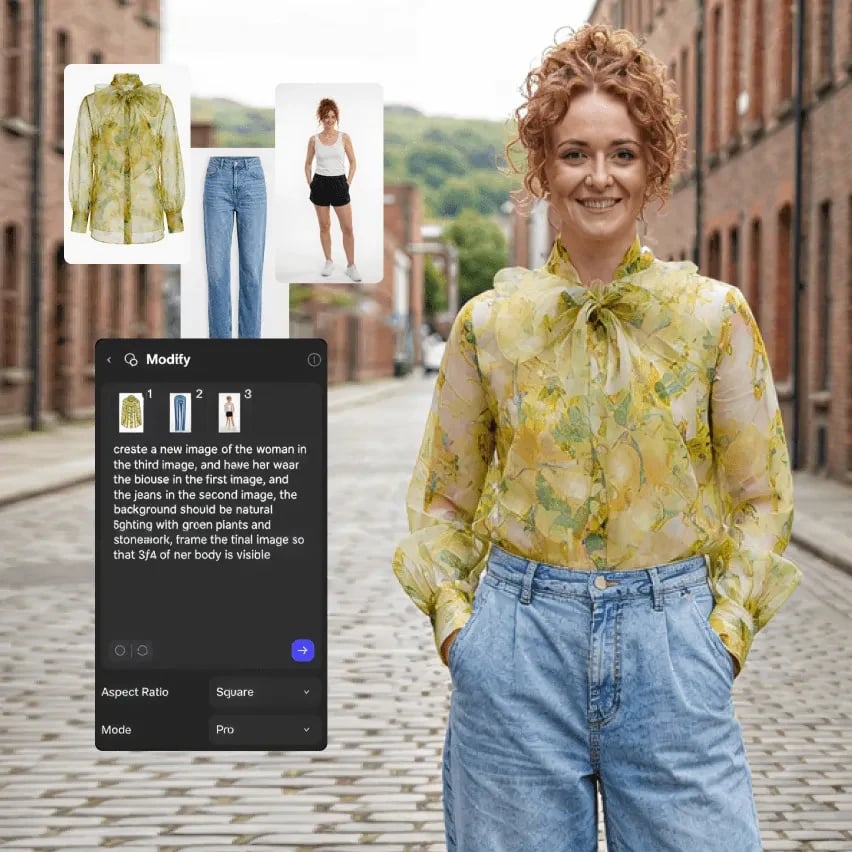
Three images: the model in @3 wearing the blouse in @1 and jeans in @2.
Tips
- Start with a verb and name what stays: “Change the midsole to gum rubber. Keep the upper the same.”
- Describe what you’d see: “Replace the plastic housing with anodized aluminum,” not “make it more premium.”
- Put the image you want shaped like the output last, because Original follows it. More in Write prompts that work.
Good to know
- Limits: 4 connected images, 5 Library mentions and 5,000 characters per prompt.
- Credits: Standard 4, 24 or 32 at 1K, 2K or 4K. Pro 30, 30 or 60.
- Show image details on a result shows its prompt, mode and resolution.
Related
Write prompts that work
Structure and examples.
Turn a sketch into a render
Sketch to final render.
Modes and resolution
Standard, Pro, 2K and 4K.
Edit part of an image
Change one area only.