

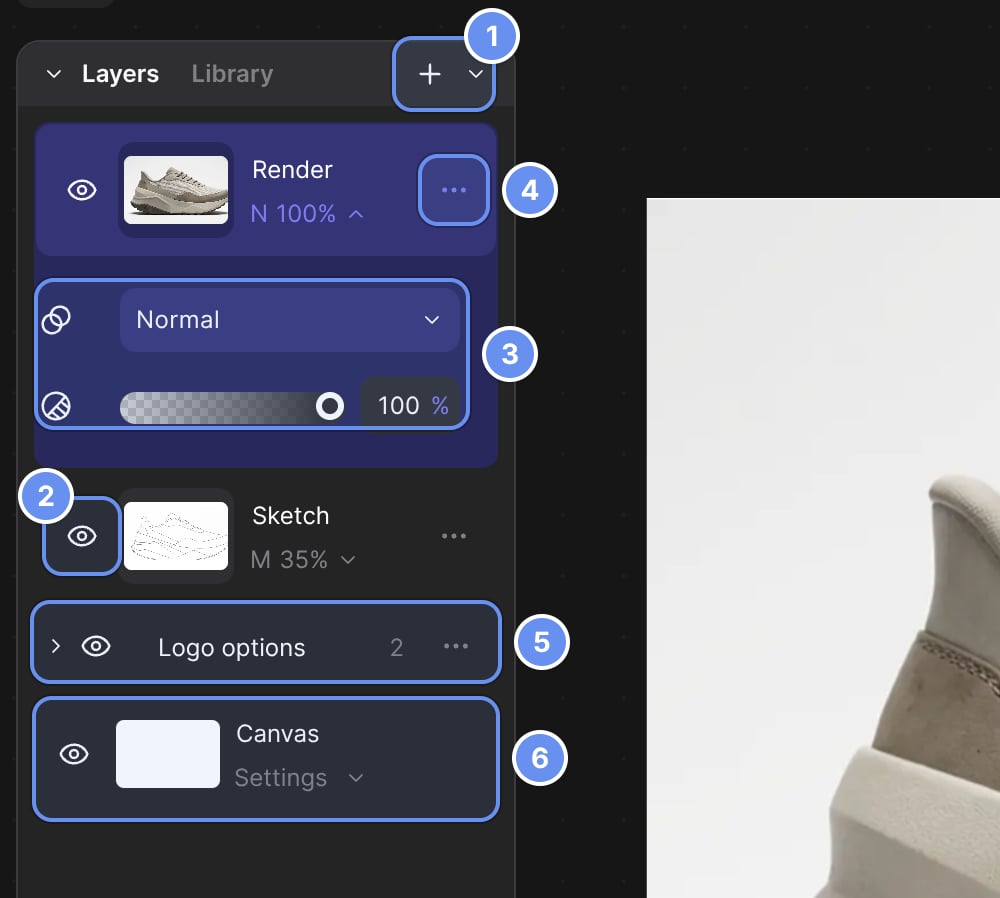
Add (1), show or hide (2), blend and opacity (3), layer menu (4), group (5), Canvas (6).
Use layers
1
Add a layer
Click + 1 or press N.
2
Show or hide it
Click the eye 2, or right-click it for Show/hide all other layers.
3
Blend it
Click the chip under the name 3 to set Blend mode and Opacity.
4
Open the layer menu
Right-click a layer or click More actions (⋯) 4 for merge, mirror, AI Actions and Generate 3D.
5
Group layers
Select two or more and press ⌘/Ctrl + G to make a group 5.
6
Set the canvas
Click Settings on the Canvas row 6, or press C, to set size and background color.
Blend modes
AI actions
Right-click a layer > AI Actions:Adjust a layer
The Adjust tab has editable Light and Color sliders for the selected layer.Examples
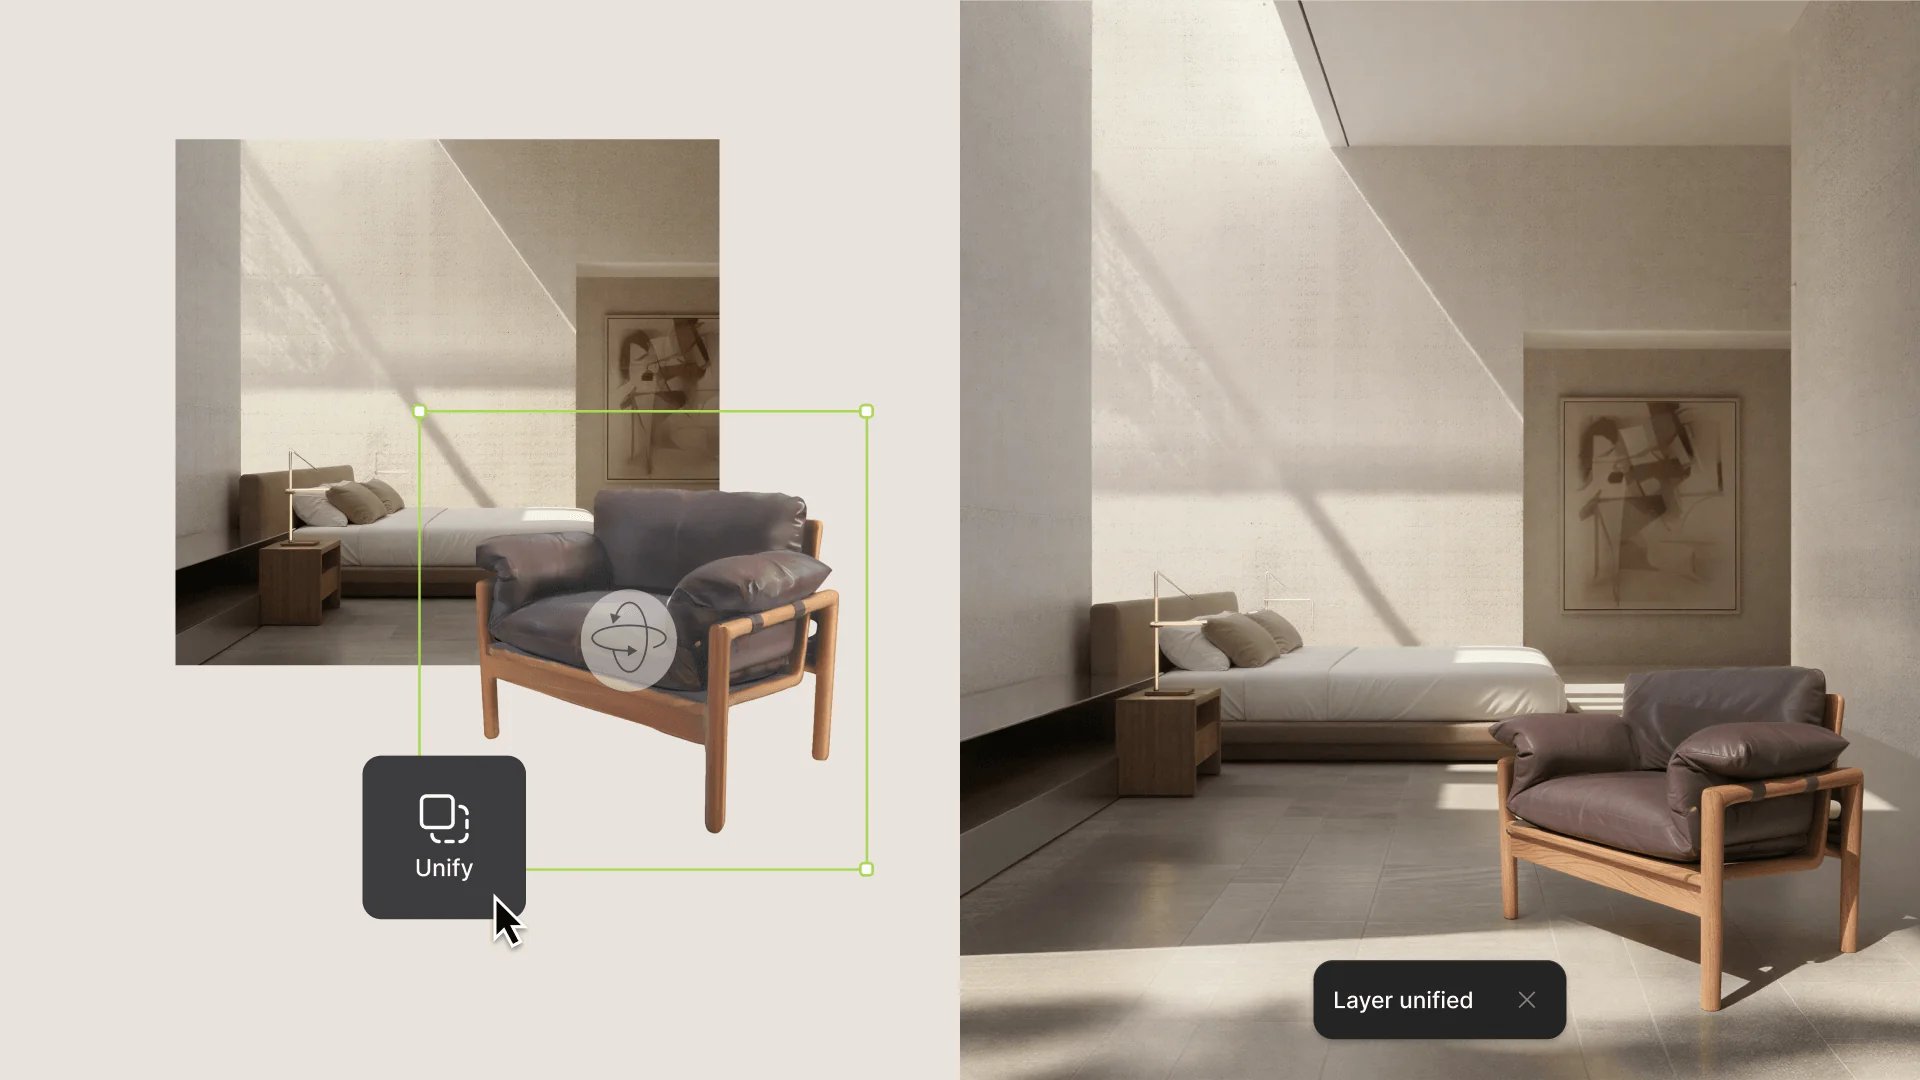
A chair layer over a room photo, before and after Unify.
Tips
- Keep the sketch on top in Multiply to check the render against your lines.
- Compare results in place: add two as layers and toggle the top one’s eye.
- Place a logo, then run Unify so it picks up the surface light.
Good to know
- No layer lock. Hide or group a layer to avoid painting on it.
- 3D layers can’t merge or go to the Workbench. Press Shift + C for a flat snapshot first.
- Generate 3D here uses Balanced mesh and Standard Definition texture. For more control, use the Make 3D tab.
Related
Colors and materials
Adjust, recolor, make PBR textures.
Make 3D from 2D
Turn a layer into 3D.
Studio at a glance
Layout and navigation.
Unify
Blend a layer into a scene.